Add Form to Website
After you create a form, you can use it on your website.
Open the Form Endpoint
- Open your form dashboard.
- Open the Code or Integration area.
- Copy the Form Submission Endpoint.
Three Common Ways to Use the Form
The dashboard supports three common paths:
- Webpages (Hosted with us)
- BYOW (Bring Your Own Website)
- Other Website
Option 1: Webpages Hosted With Us
Use this when your website is built or hosted on our platform.
- Open the form dashboard.
- Go to the integration area.
- Choose Webpages (Hosted with us).
- Open your webpage editor.
- connect the page form to the endpoint
This is usually the easiest option.
Option 2: BYOW
Use this when you brought your own website and manage its content yourself.
- Open the form dashboard.
- Go to the integration area.
- Choose BYOW.
- open your site code or editor
- use the provided endpoint in your existing form
This works well for custom HTML websites and custom front-end apps.
Option 3: Other Website
Use this when your site is hosted somewhere else.
- Copy the endpoint.
- Open your website platform.
- find the form settings or code
- add the endpoint where the form submits data
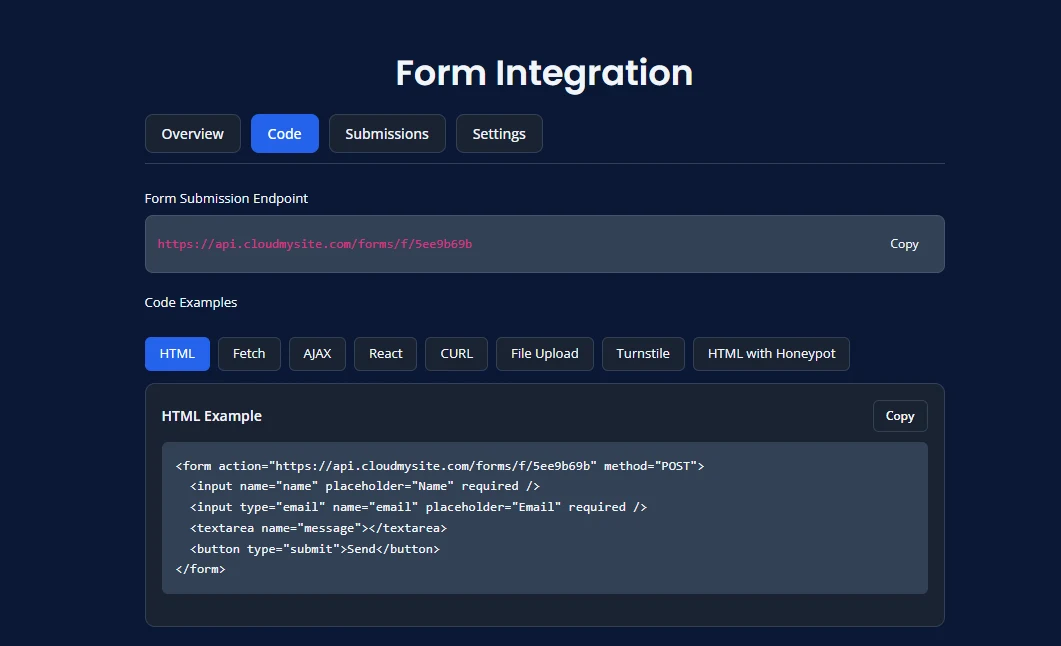
Code Section
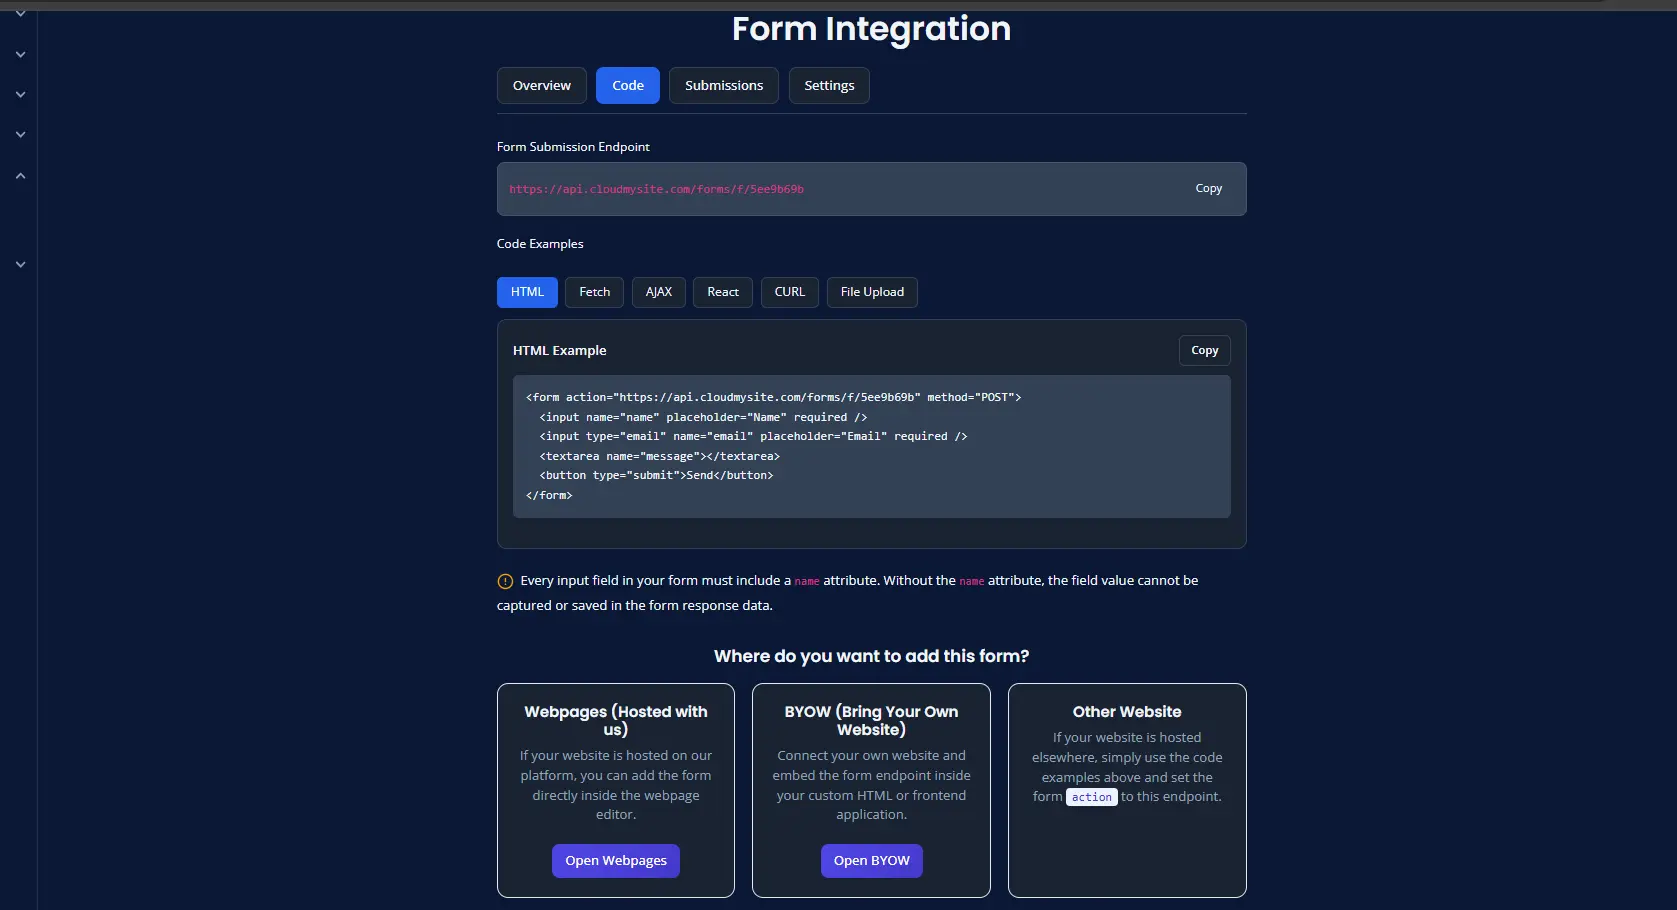 In the Code area, you may see different code tabs depending on which features are enabled for your form. The available tabs in the UI include HTML, Fetch, AJAX, React, CURL, File Upload, Turnstile, Google Sheet Setup, and HTML with Honeypot.
When Turnstile Is Enabled If Turnstile is enabled for your form, you will see a Turnstile tab in the Code area. That tab shows an example with the Turnstile widget added to the form.
When Honeypot Is Enabled If Honeypot is enabled for your form, you will see a Honeypot tab in the Code area. That tab shows an HTML example with a hidden honeypot field for spam protection.
When Google Sheet Is Enabled If Google Sheet integration is enabled, you will also see a Google Sheet Setup tab in the Code area. That section provides the setup steps and sample Apps Script needed to send submissions into Google Sheets.
Important Rule for Form Fields
Every field in your form should have a name.
Examples:
- name
- phone
- message
Without a field name, the system may not save that value in the submission.
Typical Form Fields
Common fields include:
- name
- phone
- company
- subject
- message
Test the Form
After connecting the form:
- open the live website page
- fill out the form
- submit a test message
- confirm the submission appears in your dashboard or email
If the Form Does Not Work
Check these items:
- confirm you copied the correct endpoint
- confirm your website form is using that endpoint
- confirm each form field has a name
- confirm you saved your website changes
- submit another test entry
Best Practice
Create the form first, test it on one page, and only then reuse it more widely across your site.
Code Examples
In the Code area, you may see different example tabs depending on which features are enabled for your form.
Available examples can include:
- HTML
- Fetch
- AJAX
- React
- CURL
- File Upload
- Turnstile
- Google Sheet Setup
- HTML with Honeypot
HTML
Use a simple HTML form that posts directly to your form endpoint.
<form action="https://api.cloudmysite.com/forms/f/YOUR_FORM_ID" method="POST">
  <input name="name" placeholder="Name" required />
  <input type="email" name="email" placeholder="Email" required />
  <textarea name="message"></textarea>
  <button type="submit">Send</button>
</form>
Fetch
Use JavaScript fetch() to send the form as JSON.
<script>
fetch("https://api.cloudmysite.com/forms/f/YOUR_FORM_ID", {
  method: "POST",
  headers: {
    "Content-Type": "application/json"
  },
  body: JSON.stringify({
    name: "John",
    email: "[email protected]",
    message: "Hello"
  })
});
</script>
AJAX
Use XMLHttpRequest if your site uses older JavaScript patterns.
<script>
var xhr = new XMLHttpRequest();
xhr.open("POST", "https://api.cloudmysite.com/forms/f/YOUR_FORM_ID", true);
xhr.setRequestHeader("Content-Type", "application/json");

xhr.onreadystatechange = function () {
  if (xhr.readyState === 4 && xhr.status === 200) {
    console.log("Form submitted");
  }
};

xhr.send(JSON.stringify({
  name: "John",
  email: "[email protected]"
}));
</script>
React
Use this in a React component to submit the form with JavaScript.
import { useState } from "react";

export default function ContactForm() {
  const [status, setStatus] = useState("");

  const submit = async (e) => {
    e.preventDefault();

    const formData = {
      name: e.target.name.value,
      email: e.target.email.value
    };

    const res = await fetch("https://api.cloudmysite.com/forms/f/YOUR_FORM_ID", {
      method: "POST",
      headers: {
        "Content-Type": "application/json"
      },
      body: JSON.stringify(formData)
    });

    if (res.ok) {
      setStatus("Message sent!");
      e.target.reset();
    }
  };

  return (
    <form onSubmit={submit}>
      <input name="name" placeholder="Name" required />
      <input name="email" type="email" required />
      <button type="submit">Send</button>
      {status && <p>{status}</p>}
    </form>
  );
}
CURL
Use this for testing from the command line.
curl -X POST https://api.cloudmysite.com/forms/f/YOUR_FORM_ID \
  -H "Content-Type: application/json" \
  -d '{"name":"John","email":"[email protected]"}'
File Upload
Use this when your form includes file uploads such as resumes, documents, or images.
<form id="careerForm">
  <input name="name" placeholder="Name" required />
  <input type="email" name="email" placeholder="Email" required />
  <textarea name="message" placeholder="Message"></textarea>
  <input type="file" id="resumeFile" name="resume" />
  <button type="submit">Send</button>
</form>

<script>
document.getElementById("careerForm").addEventListener("submit", async function (e) {
  e.preventDefault();

  const form = e.target;
  const fileInput = document.getElementById("resumeFile");

  let uploadedFiles = [];

  if (fileInput.files.length > 0) {
    const multipart = new FormData();
    multipart.append("resume", fileInput.files[0]);

    const uploadRes = await fetch("https://api.cloudmysite.com/forms/f/YOUR_FORM_ID/upload", {
      method: "POST",
      body: multipart
    });

    const uploadJson = await uploadRes.json();

    if (!uploadRes.ok || !uploadJson.success) {
      alert(uploadJson.error || "File upload failed");
      return;
    }

    uploadedFiles = uploadJson.files || [];
  }

  const submitRes = await fetch("https://api.cloudmysite.com/forms/f/YOUR_FORM_ID", {
    method: "POST",
    headers: {
      "Content-Type": "application/json"
    },
    body: JSON.stringify({
      name: form.name.value,
      email: form.email.value,
      message: form.message.value,
      files: uploadedFiles
    })
  });

  if (submitRes.ok) {
    document.body.innerHTML = await submitRes.text();
  } else {
    alert("Form submission failed");
  }
});
</script>
Turnstile
If Turnstile is enabled for your form, use the Turnstile widget in your form.
<form action="https://api.cloudmysite.com/forms/f/YOUR_FORM_ID" method="POST">
  <input name="name" placeholder="Name" required />
  <input type="email" name="email" placeholder="Email" required />
  <textarea name="message"></textarea>

  <div class="cf-turnstile" data-sitekey="YOUR_SITE_KEY"></div>

  <button type="submit">Send</button>
</form>

<script src="https://challenges.cloudflare.com/turnstile/v0/api.js" async defer></script>
Turnstile (Local Testing)
For local development, you can replace YOUR_SITE_KEY with Cloudflare test key:
- works on localhost without domain setup
- use only for testing
- replace with real site key in production
HTML with Honeypot
If Honeypot protection is enabled, add a hidden field to reduce spam submissions.
<form action="https://api.cloudmysite.com/forms/f/YOUR_FORM_ID" method="POST">
  <input name="name" placeholder="Name" required />
  <input type="email" name="email" placeholder="Email" required />
  <textarea name="message"></textarea>

  <div style="position:absolute; left:-9999px;">
    <label>Leave this field empty</label>
    <input type="text" name="_honeypot" />
  </div>

  <button type="submit">Send</button>
</form>
Google Sheet Setup
If Google Sheet integration is enabled, you can send submissions into a Google Sheet using Apps Script.
function doPost(e) {
  try {
    var data = JSON.parse(e.postData.contents);
    var sheet = SpreadsheetApp.getActiveSpreadsheet().getSheetByName("Sheet1");
    sheet.appendRow([
      new Date(),
      data.name,
      data.email,
      data.message,
      data.formName,
      data.date,
      data.timestamp,
      data.ip
    ]);

    return ContentService
      .createTextOutput(JSON.stringify({ status: "success" }))
      .setMimeType(ContentService.MimeType.JSON);
  } catch (err) {
    return ContentService
      .createTextOutput(JSON.stringify({ status: "error", message: err.message }))
      .setMimeType(ContentService.MimeType.JSON);
  }
}
Setup steps:
Open Google Sheets and create a new sheet or use an existing one. Go to Extensions → Apps Script. Paste the script above. Save and deploy it as a Web app. Set access to Anyone with the link. Copy the Web App URL. Paste that URL into your form settings.
Do not use the normal Google Sheet URL. Use the Apps Script Web App URL.
Notes Replace YOUR_FORM_ID with your real form endpoint. Replace YOUR_SITE_KEY with your real Turnstile site key when Turnstile is enabled. Every field should include a name attribute. Test your form after setup to confirm submissions are received.