Create a Form
Creating a form is the main setup step. Once your form is created, the system gives you a form endpoint that your website can use.
Open Form Setup
- Open Forms in your dashboard.
- Choose your active plan.
- Click Configure Form.
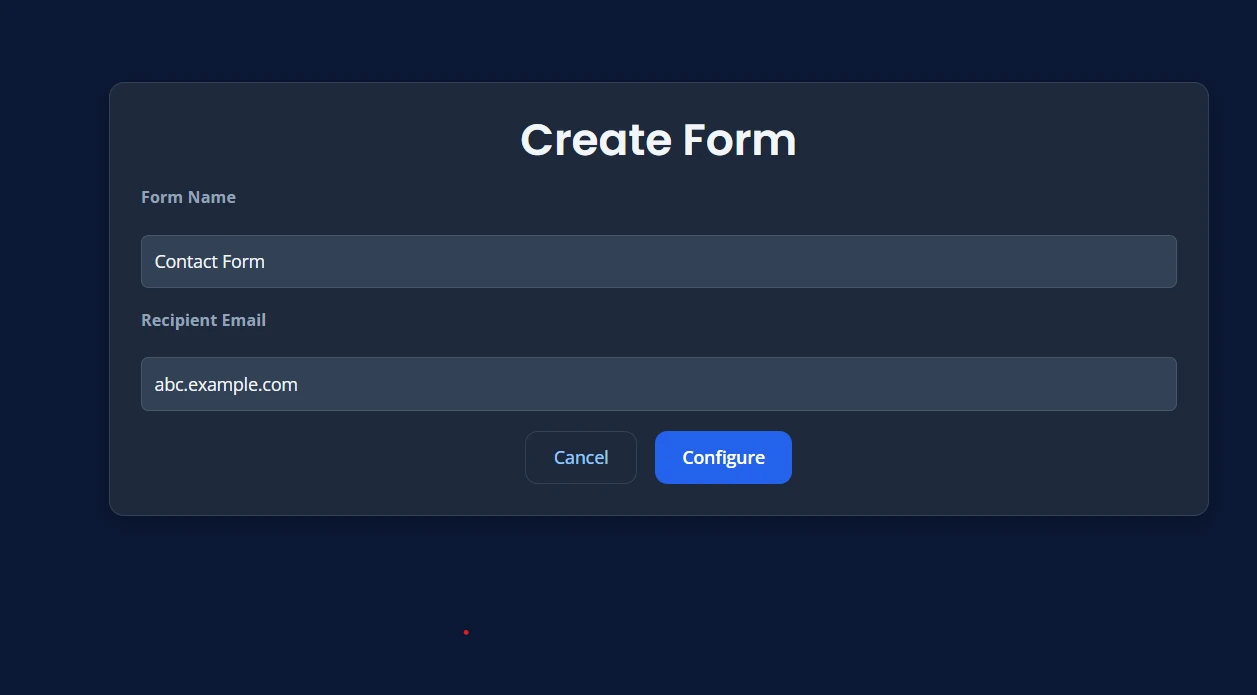
Form Setup Screen
This is the screen where you create your form.

Fill in the Form Details
You will usually see these fields:
- Form Name
- Recipient Email
After entering the details, the form setup will look like this:
Form Name
Use a simple name that helps you identify the form later.
Examples:
- Contact Form
- Support Form
- Quote Request Form
- Career Form
Recipient Email
This is the email address that should receive form submissions.
Examples:
Save the Form
- Check your form name.
- Check the recipient email.
- Click Configure.
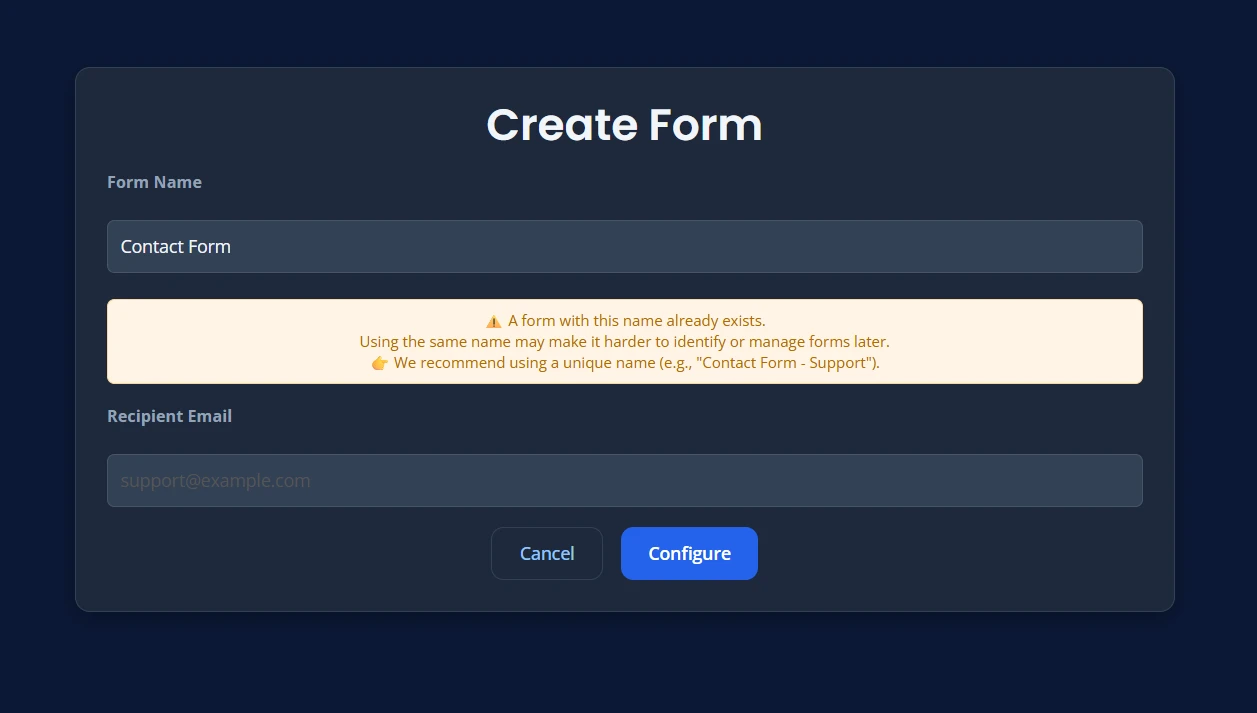
Important Note for Paid Plans
On paid plans, if you enter a form name that already exists or use a name that is not accepted by the system, you may see an error message.
This is expected behavior and helps prevent confusion when managing forms later.
If this happens, update the form name and try again.
What Happens Next
After the form is created:
- the system saves your form
- a unique form endpoint is generated
- you can move to the integration step
- you can later manage this form from the dashboard
How It Looks After Form Creation
Once the form is successfully created, you will see the created form view in the dashboard.
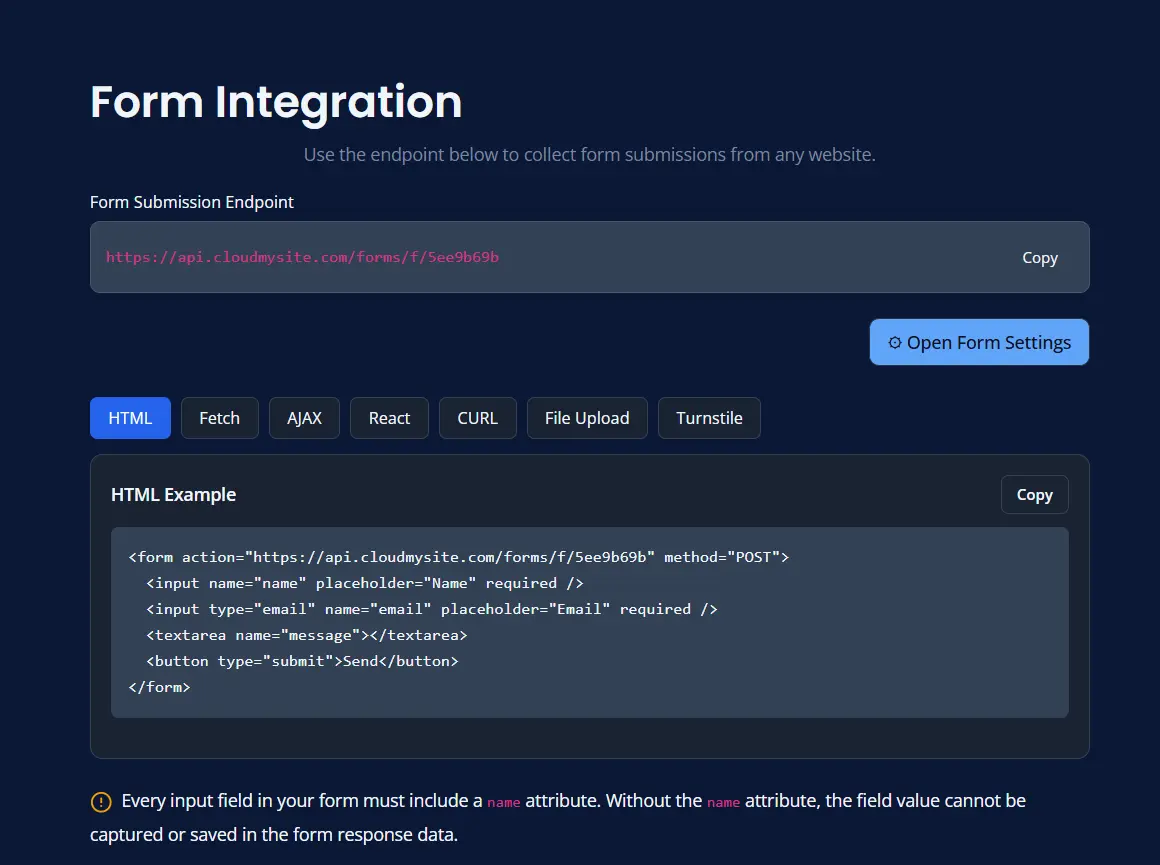
Form Endpoint
The form endpoint is the address your website sends form data to.
You do not need to understand the technical details. Usually you only need to:
- copy the endpoint
- paste it into your website form setup
If the Form Name Is Empty
The dashboard may show an error if you try to save without a form name.
To fix it:
- enter a simple form name
- save again
If the Recipient Email Is Blank
If you do not enter a recipient email, the system may use your account email instead.
Even so, it is better to enter the exact email you want to use for that form.
Good Naming Tips
Choose names that are easy to understand later.
Good examples:
- Contact Form
- Pricing Enquiry
- Demo Request
- Customer Support
Less clear examples:
- Form 1
- Test
- New Form
After Creating the Form
Once the form is ready, your next step is usually one of these:
- add it to a webpage hosted with us
- add it to a BYOW website
- add it to another external website