Form Settings Overview
The Form Settings area lets you control what happens when someone submits your form.
You can use these settings to manage notifications, visitor flow, spam protection, uploads, and integrations.
Open Settings
- Open Forms.
- Choose your plan.
- Click 🛠️ Form Settings.
You can also reach settings from the integration area by using Open Form Settings.
Settings Example
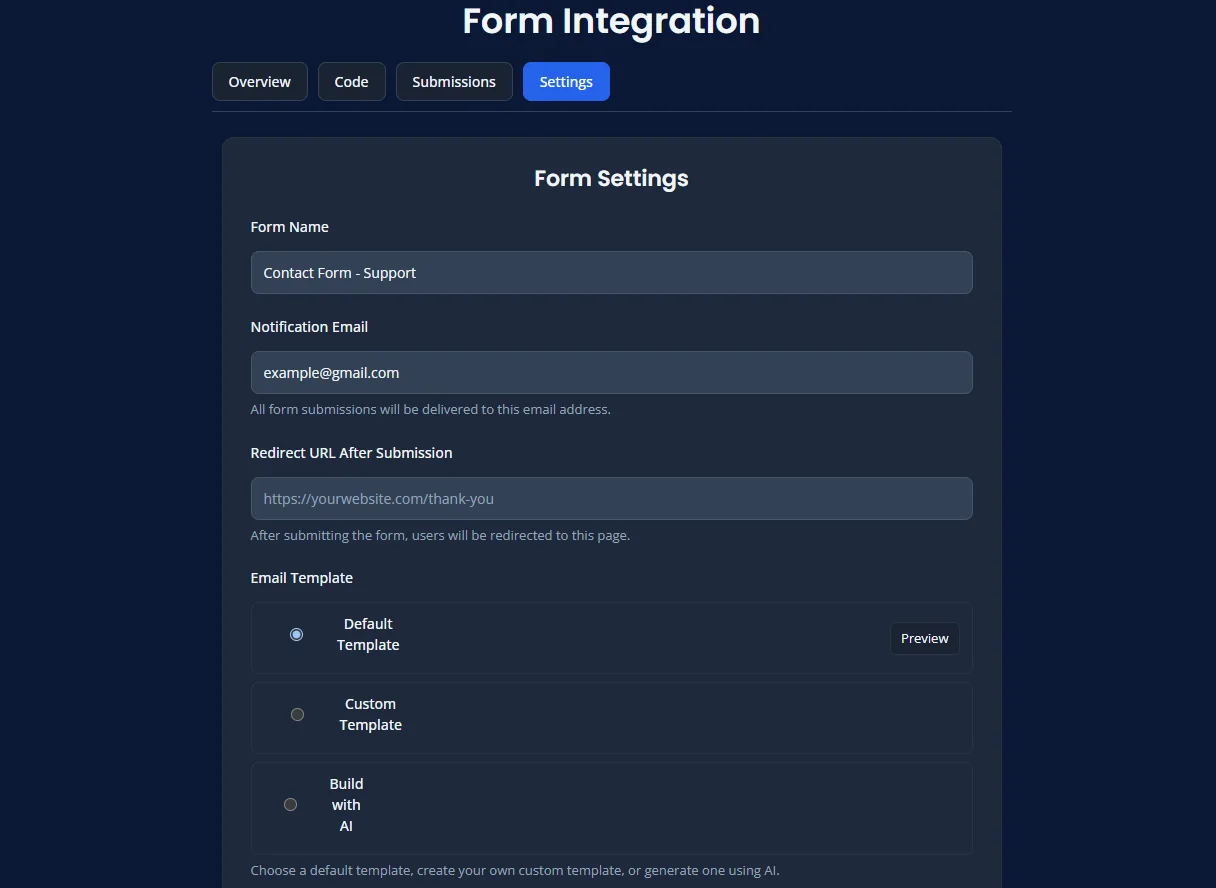
Settings Included
Form Name
The Form Name helps you identify the form inside your dashboard.
Use a clear name so you can quickly recognize what the form is used for.
Recipient Email
The Recipient Email is the address that receives new form submissions.
This helps you send enquiries to the correct person, inbox, or team.
Redirect URL
A Redirect URL sends the visitor to another page after form submission.
This is useful for thank-you pages, confirmations, or next-step pages.
Email Template
The Email Template controls how notification emails look when submissions are sent.
You can use a default design, a custom layout, or AI-assisted template generation.
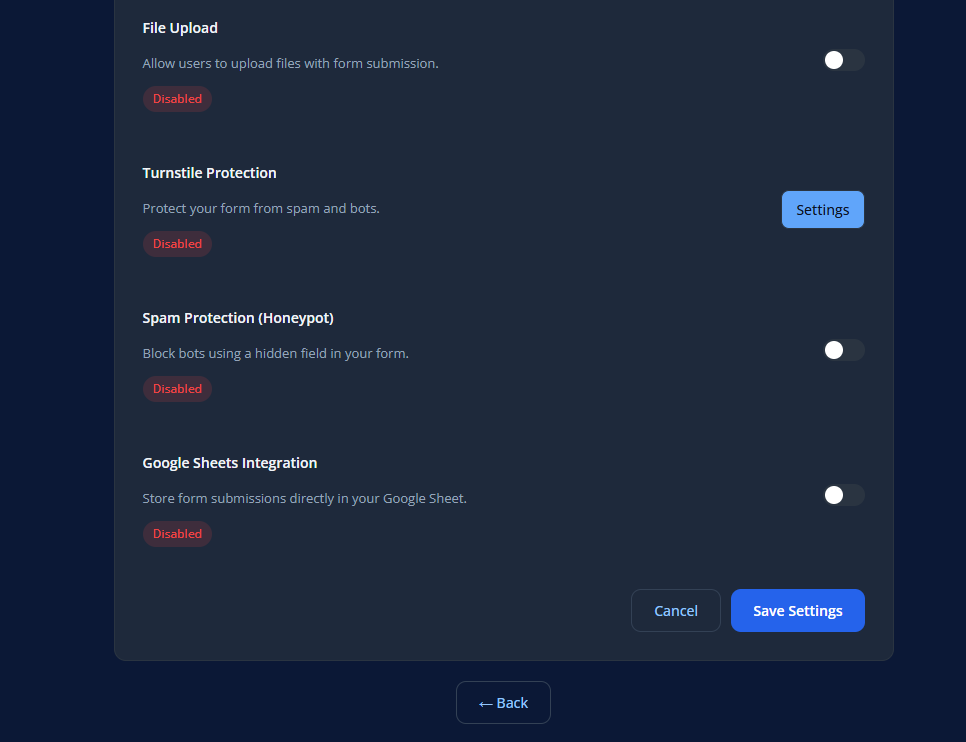
Spam Protection
Spam Protection helps reduce fake submissions and bot traffic.
Options may include Honeypot, built-in Turnstile, or custom CAPTCHA providers.
File Upload
File Upload lets visitors attach files when submitting the form.
This is useful for resumes, screenshots, documents, or other supporting files.
Google Sheets Integration
Google Sheets Integration sends form submissions into a Google Sheet automatically.
This helps with tracking, sharing, reporting, and maintaining a backup of submissions.
Save Changes
After updating settings:
- Click Save Settings.
- Test the form again.
- Confirm the new behavior works as expected.