Getting Started with Newsletter
This guide explains the complete CloudMySite Newsletter setup flow from choosing a plan to opening the dashboard.
Step 1: Open the Newsletter landing page
Start from the Newsletter landing page on CloudMySite. This page explains the product and shows available pricing plans.
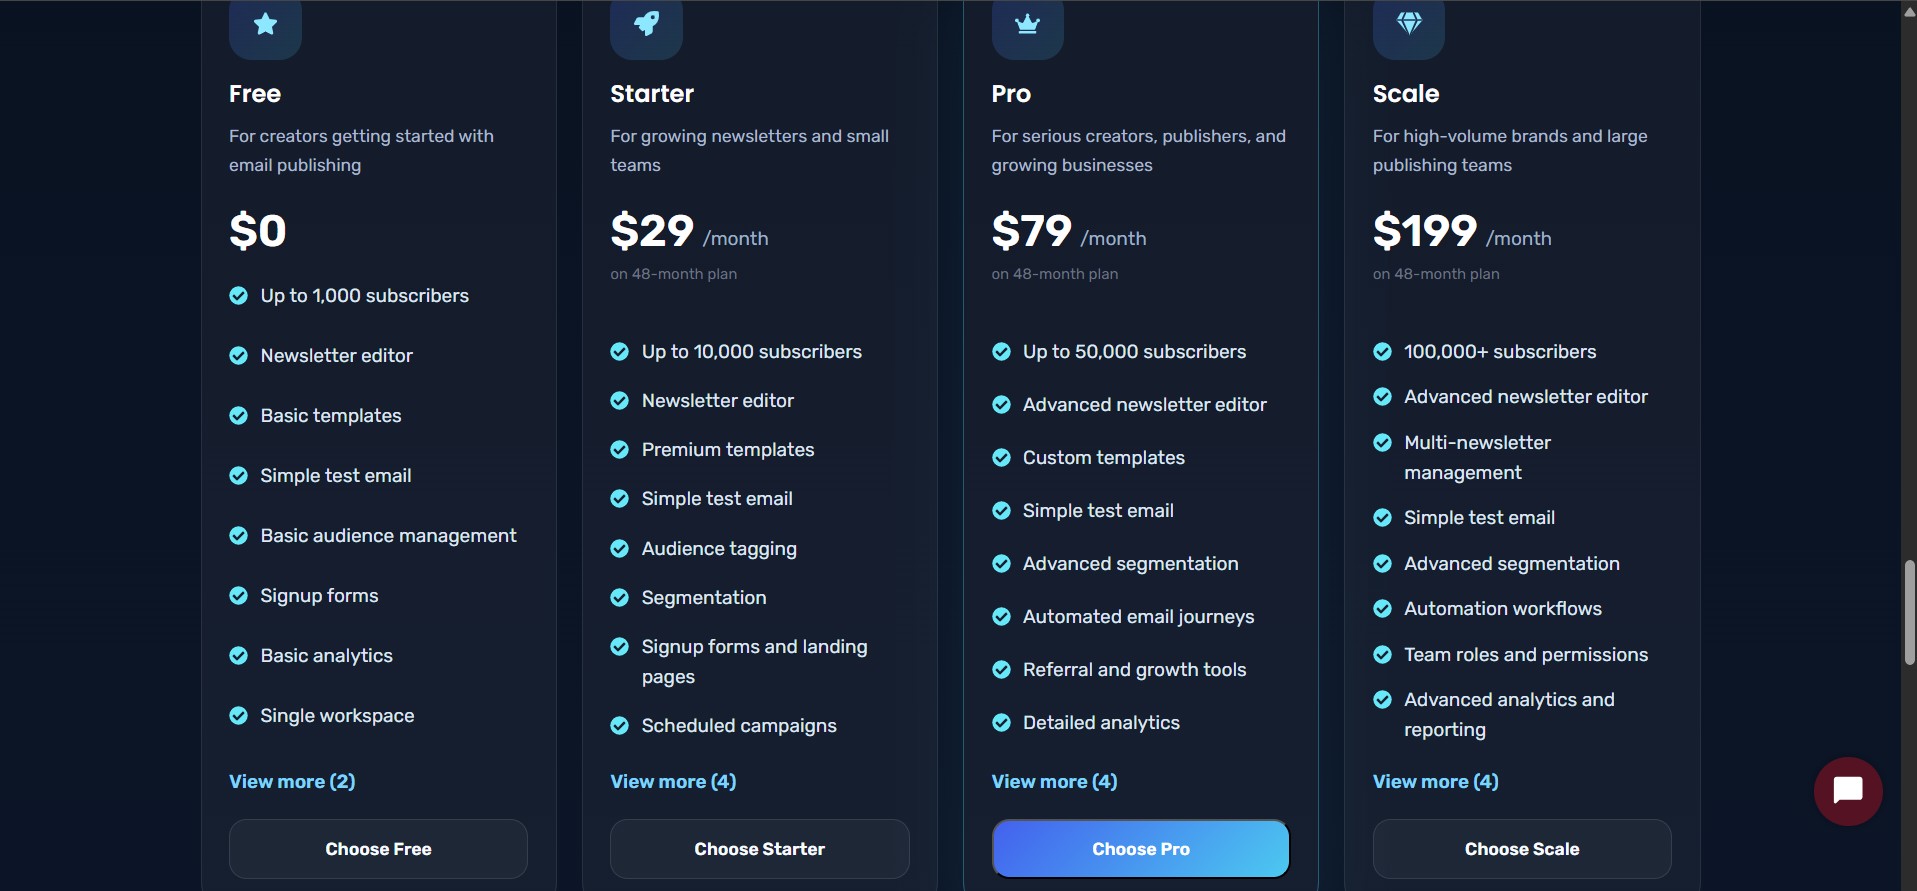
The pricing section includes:
- Free
- Starter
- Pro
- Scale
Each plan shows the monthly price, plan description, and included features.
Step 2: Choose a plan
Click the Choose button on the plan you want.
When a user chooses a plan, the selected plan name and price are stored temporarily for checkout. This allows the checkout page to know which plan the user selected.
Example selected plan data:
{
  "name": "Starter",
  "price": 29
}
Step 3: Continue to payment or activate Free Plan
After selecting a plan, users continue to the payment or activation screen.
If the selected plan is Free, users can activate the newsletter instantly without payment.
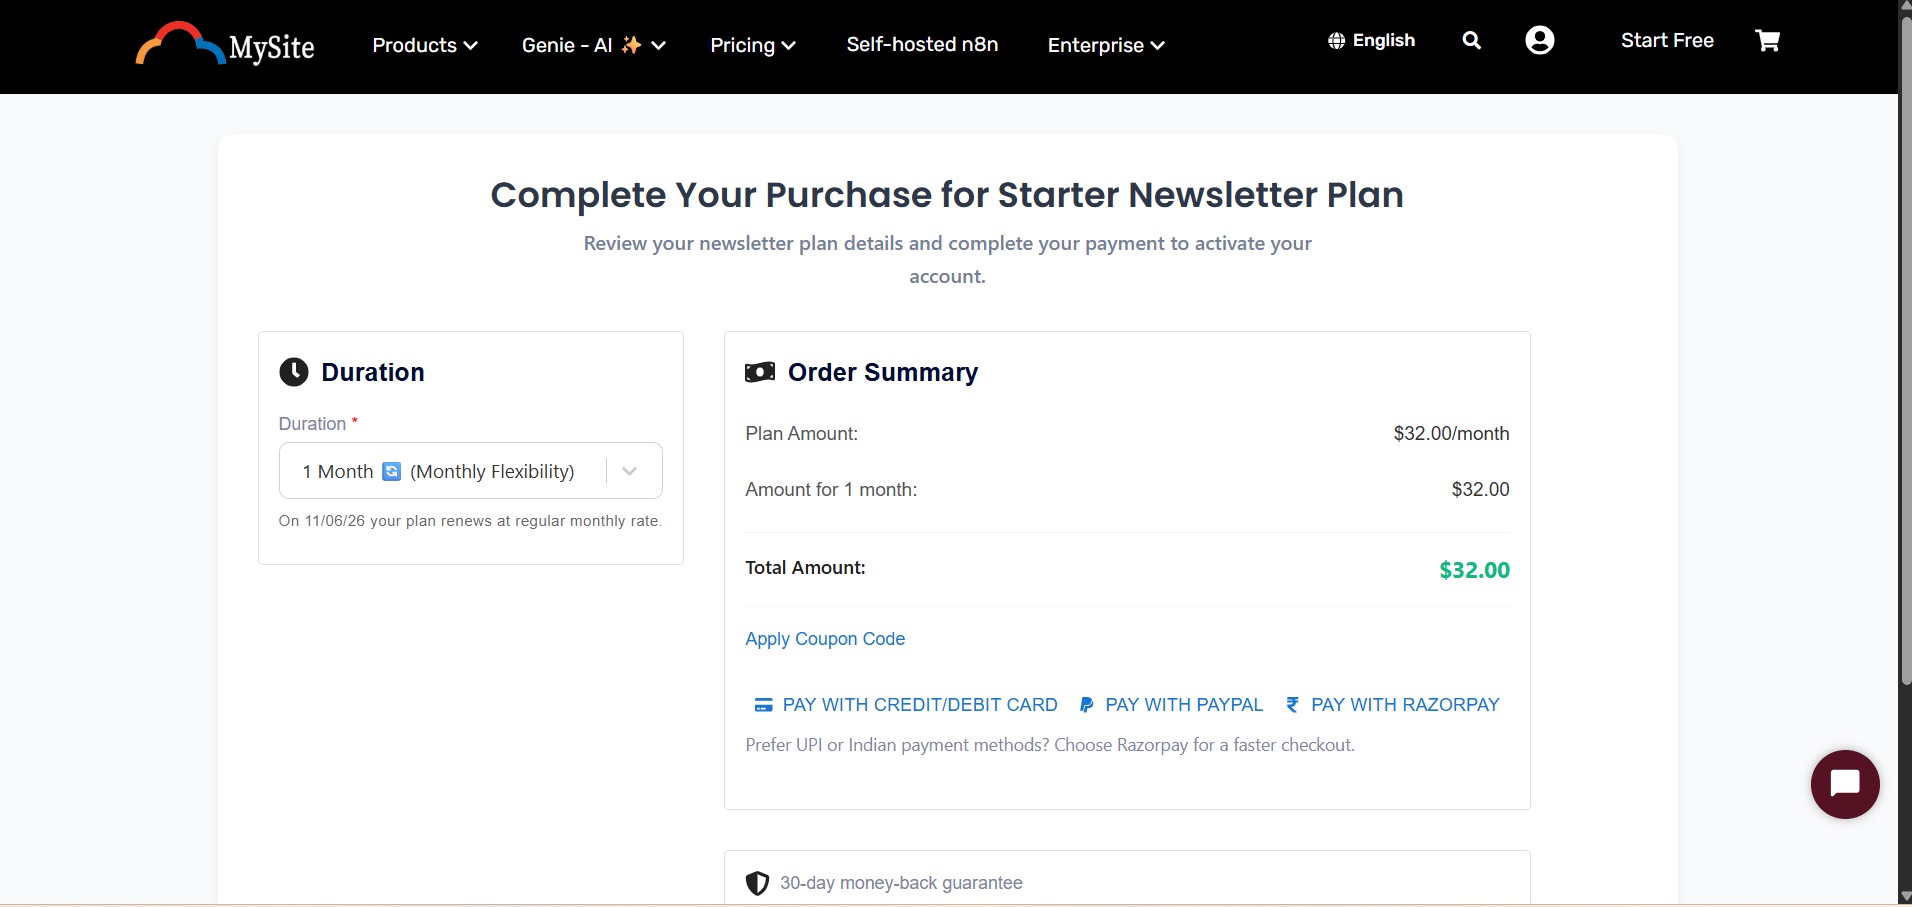
For paid plans, users can review checkout details including:
- Plan duration
- Coupon codes
- Payment method
Supported payment options include:
- Credit/Debit Card
- PayPal
- Razorpay for users in India
Step 5: Redirect to Newsletter dashboard
After successful free activation or payment, the user is redirected to:
https://newsletter.cloudmysite.com
The redirect can include a newsletter workspace id:
https://newsletter.cloudmysite.com?id=NEWSLETTER_ID
The dashboard reads this id, prepares the workspace, and stores the newsletter dashboard/account information for the session.
Step 6: Workspace preparation
When the user lands on the Newsletter dashboard, the app prepares the workspace.
Users may briefly see:
Preparing your workspace...
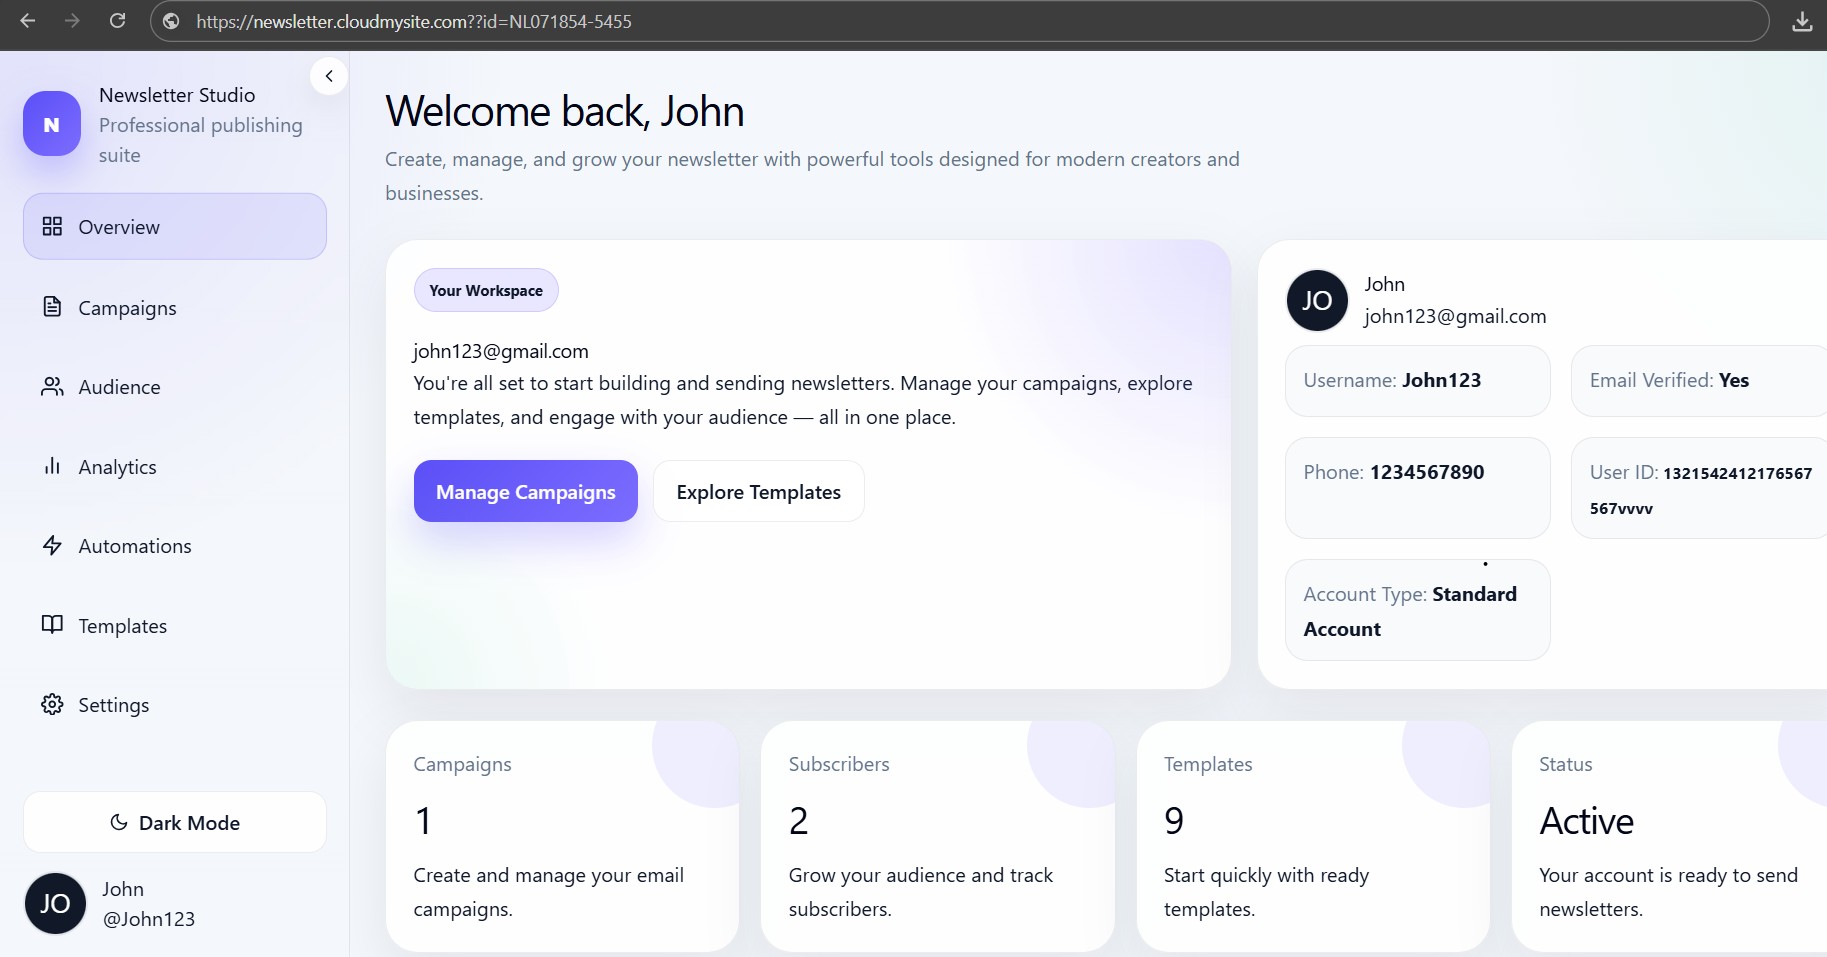
After setup is complete, the Newsletter Studio dashboard opens.
Step 7: Start using the dashboard
From the dashboard, users can start with:
- Overview to see the workspace
- Campaigns to create a campaign
- Audience to manage subscribers
- Analytics to check performance
- Automations to build workflows
- Templates to use prebuilt layouts
- Settings to manage account details