Automation Builder
The Automation Builder is where users build the actual email journey inside an automation flow.
A working automation can include:
- Email steps
- Delay steps
- Saved subject lines
- Saved email body content
- Personalization variables
- Flow activation or pause controls
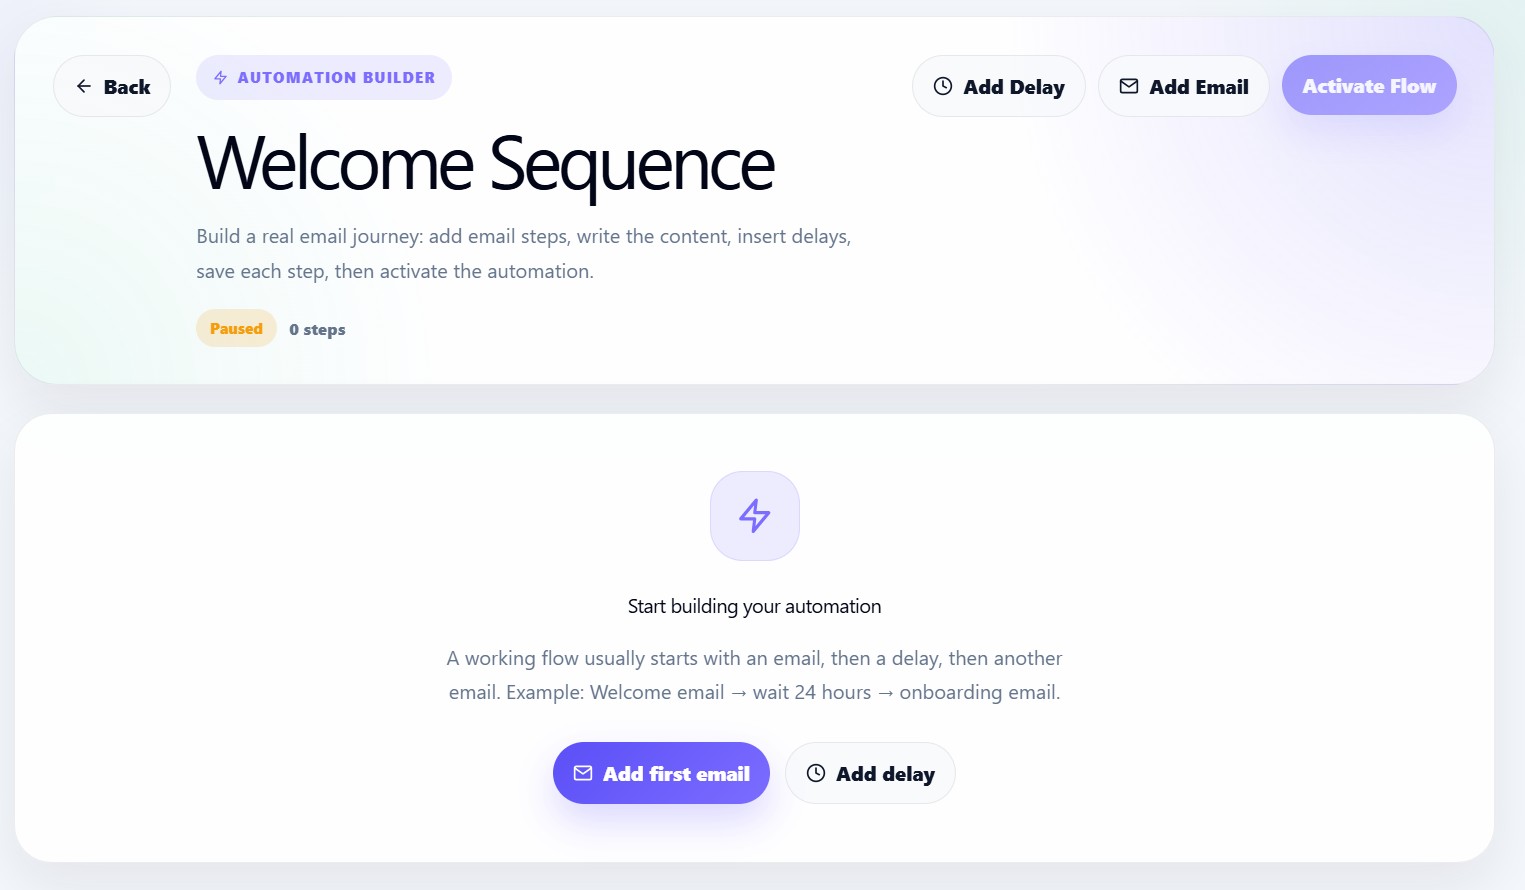
Builder layout
The Automation Builder contains:
- Back button
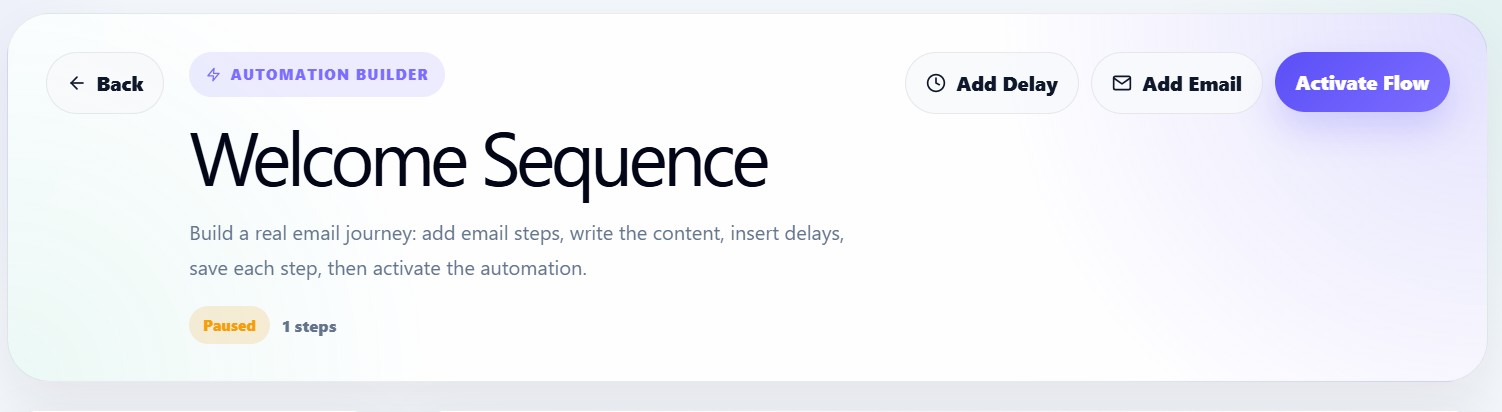
- Flow title
- Flow status
- Step count
- Add Delay button
- Add Email button
- Activate or Pause button
- Flow summary sidebar
- Main flow canvas
Loading automation flow
When the builder opens, it loads the selected automation using the automation ID.
The builder fetches:
- Automation details
- Automation status
- Automation steps
If loading is still in progress, the user sees:
Loading automation flow...
Empty builder state
If the automation has no steps, the builder shows a helpful empty state.
It suggests a simple flow:
Welcome email → wait 24 hours → onboarding email
Users can start by clicking:
- Add first email
- Add delay
Adding an email step
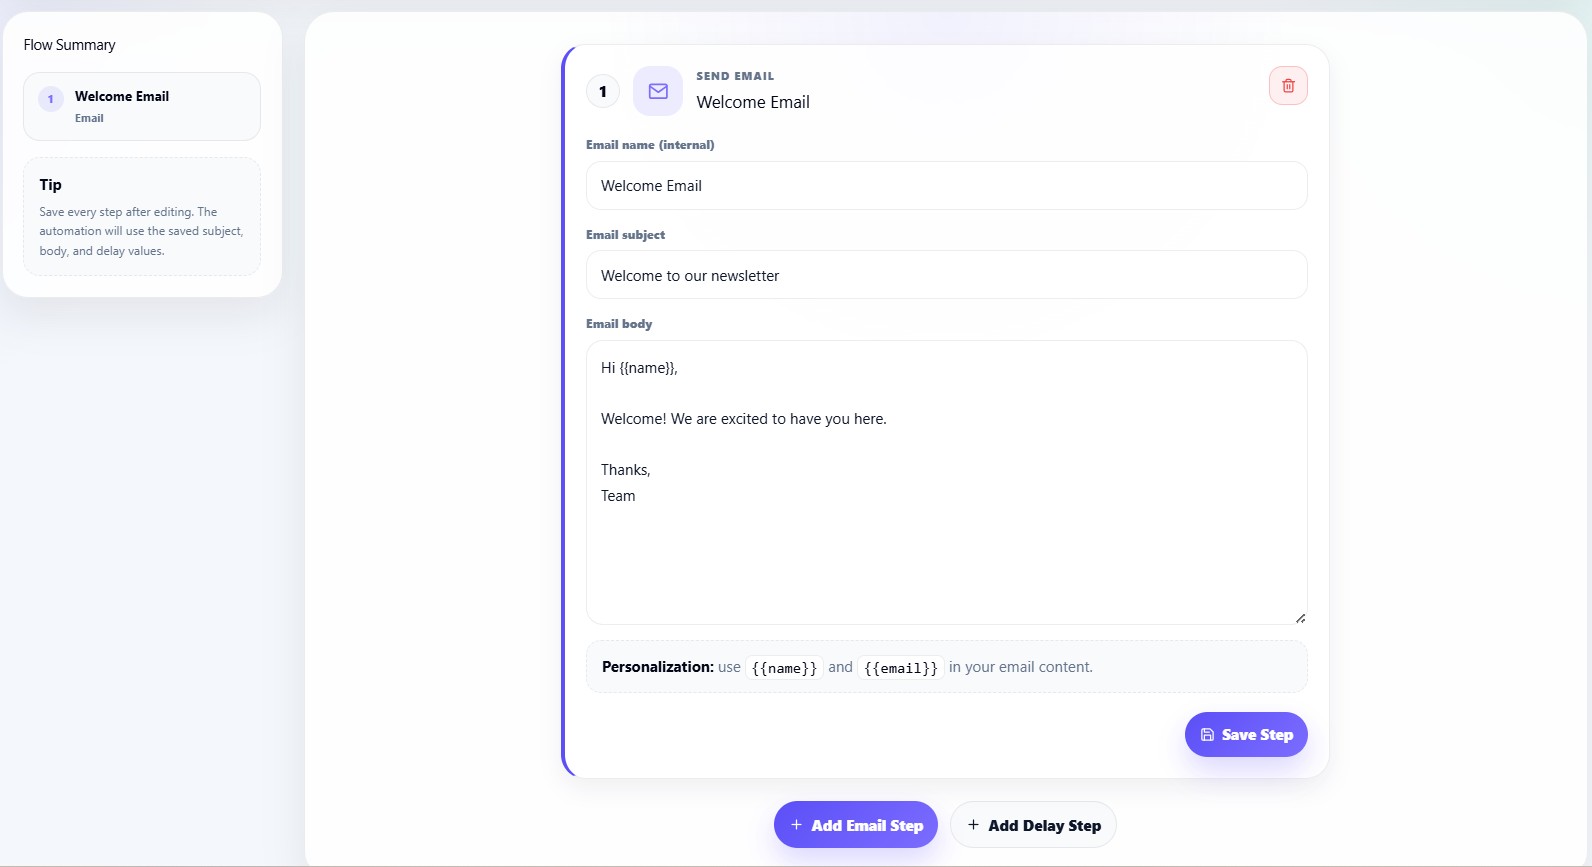
An email step sends an email as part of the automation journey.
When a user adds an email step, the system creates a default email with:
Subject: Welcome to our newsletter
Body: Hi {{name}}, Welcome! We are excited to have you here.
The user can then customize the email.
Email step fields
Each email step includes:
| Field | Description |
|---|---|
| Email name | Internal name for identifying the step |
| Email subject | Subject line sent to subscribers |
| Email body | Main email message content |
Personalization variables
The email body supports personalization variables.
Available examples:
{{name}}
{{email}}
Example:
Hi {{name}},

Welcome to our newsletter. We are happy to have you here.
Adding a delay step
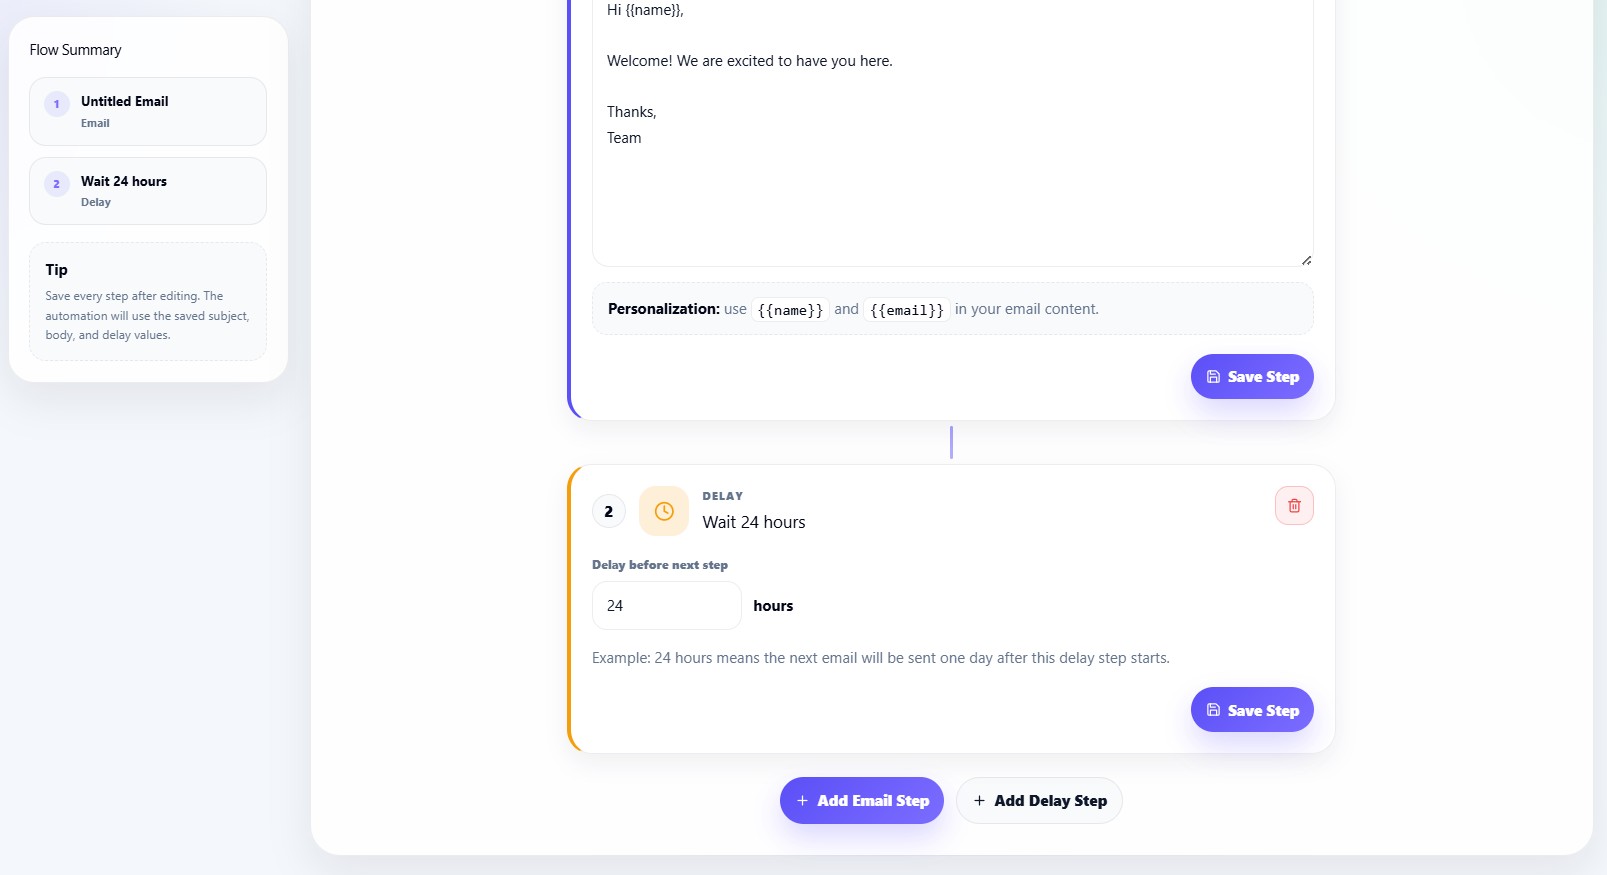
A delay step waits before the next action happens.
Default delay:
24 hours
Delay steps are useful for spacing out automated emails.
Example:
Send welcome email
→ Wait 24 hours
→ Send onboarding email
Delay step field
The delay editor contains:
| Field | Description |
|---|---|
| Delay before next step | Number of hours before the next step runs |
The delay must be at least:
1 hour
Saving steps
Each step must be saved after editing.
For email steps, users must provide:
- Email subject
- Email body
For delay steps, users must provide:
- Delay value of at least 1 hour
If validation fails, the builder shows an error message.
Deleting steps
Users can delete any step from the automation journey.
Before deleting, the dashboard asks:
Delete this automation step?
Flow summary sidebar
The Flow Summary sidebar displays all steps in order.
For each step, it shows:
- Step number
- Step name
- Step type
- Delay timing, if applicable
This helps users understand the complete journey before activation.
Flow canvas
The flow canvas displays each step as a visual node.
Email nodes show:
- Step index
- Email icon
- Email name or subject
- Email editor
- Save button
Delay nodes show:
- Step index
- Clock icon
- Delay duration
- Delay editor
- Save button
Steps are connected visually so users can understand the sequence.
Activating automation
After adding and saving steps, users can activate the flow.
The builder rule is:
Add at least one step before activating.
If a flow has no steps, the Activate button is disabled or shows a warning.
Pausing automation
If the automation is already active, the main action changes to:
Pause Flow
This lets users stop the flow without deleting it.
Success and error messages
The builder displays messages for important actions.
Success messages include:
- Step saved successfully
- Automation activated successfully
- Automation paused successfully
Error messages include:
- Email subject is required
- Email body is required
- Delay must be at least 1 hour
- Failed to save step
- Failed to load automation
Recommended automation example
A simple welcome journey can be:
Step 1: Send Email
Subject: Welcome to our newsletter

Step 2: Delay
Wait 24 hours

Step 3: Send Email
Subject: Here is what to expect next
Best practices
Use automation to:
- Welcome new subscribers
- Introduce your brand
- Send onboarding content
- Promote important links
- Re-engage inactive readers
- Run product launch sequences
Keep each automation simple and focused. A good first flow is usually a welcome email followed by one or two follow-up emails.