Automation
The Automation section lets users automate their newsletter process using reusable flows. It is designed for welcome sequences, onboarding emails, launch drips, re-engagement journeys, and manual email workflows.
Users can create an automation flow, choose a trigger, add email and delay steps inside the builder, then activate the flow when it is ready.
Automation Studio overview
The Automation page is divided into four main areas:
- Automation hero section
- Create automation card
- Automation statistics
- Automation flow list
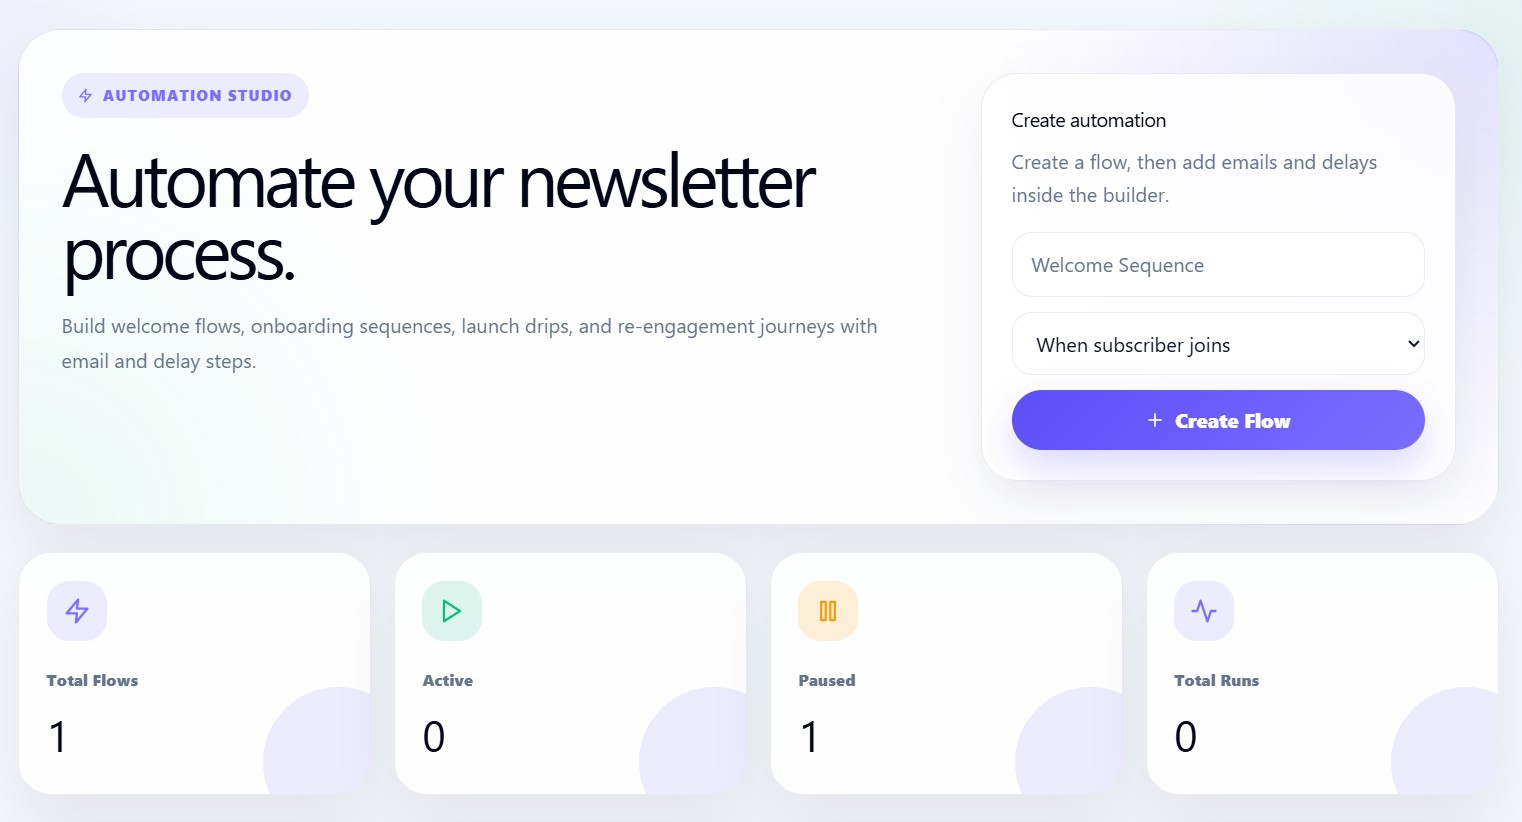
Create automation
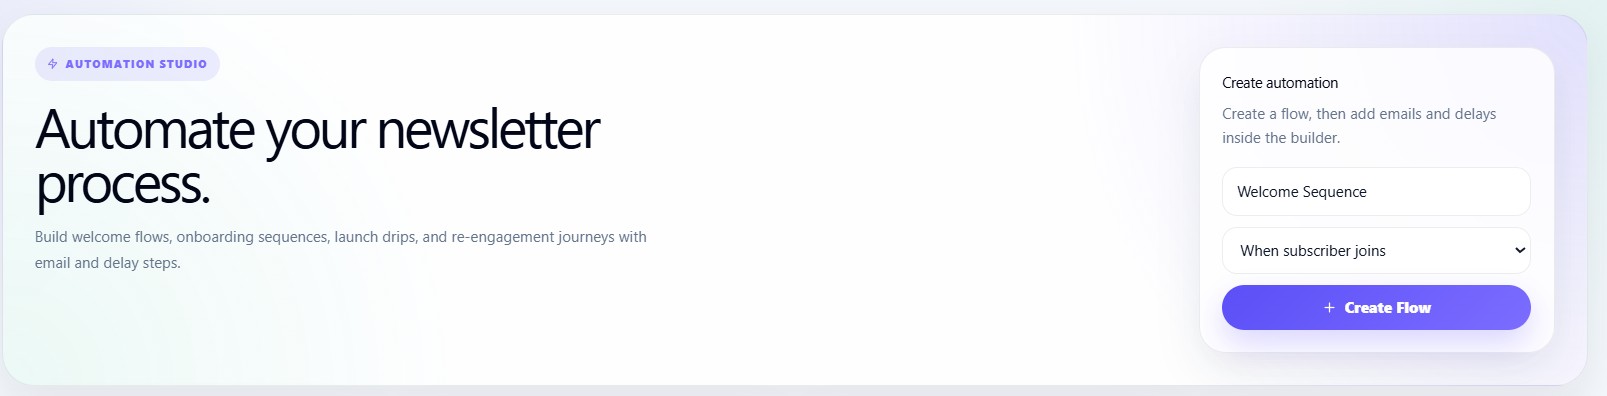
Users can create a new flow from the Create automation card.
The form includes:
| Field | Description |
|---|---|
| Automation name | The internal name for the flow |
| Trigger type | Defines how the automation starts |
| Create Flow button | Creates the new automation |
Example automation names:
- Welcome Sequence
- New Subscriber Onboarding
- Product Launch Drip
- Weekly Nurture Flow
- Re-engagement Campaign
Trigger types
The automation system supports trigger types.
| Trigger | Dashboard label | Meaning |
|---|---|---|
subscriber_created | Subscriber joins | Starts when a new subscriber joins |
manual | Manual start | Starts manually or from a manual process |
The default trigger is:
When subscriber joins
Automation creation flow
Automations
→ Enter automation name
→ Select trigger type
→ Click Create Flow
→ Open flow from automation list
→ Add email and delay steps
→ Activate flow
Automation statistics

The page shows automation summary cards:
| Stat | Description |
|---|---|
| Total Flows | Total automation flows created |
| Active | Flows currently running |
| Paused | Flows not currently active |
| Total Runs | Total automation executions |
These cards help users quickly understand how many workflows exist and how active the automation system is.
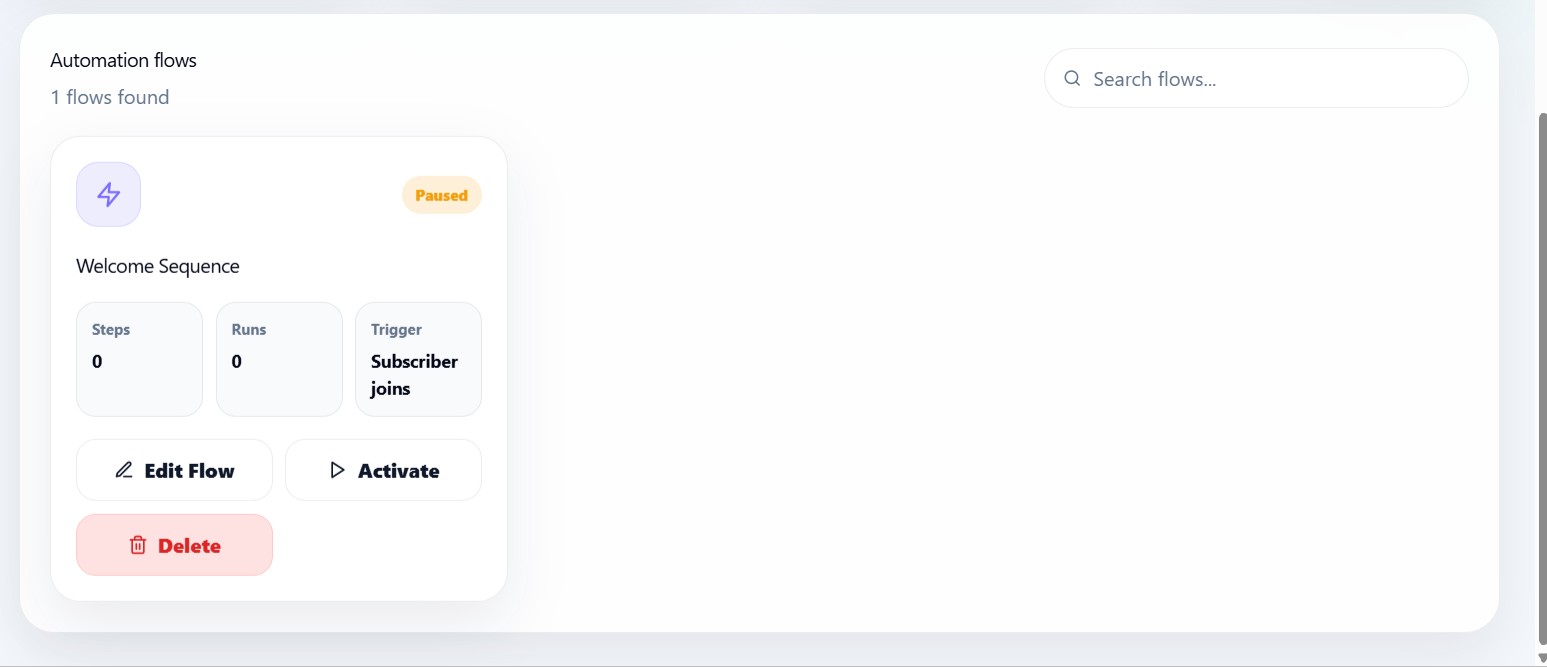
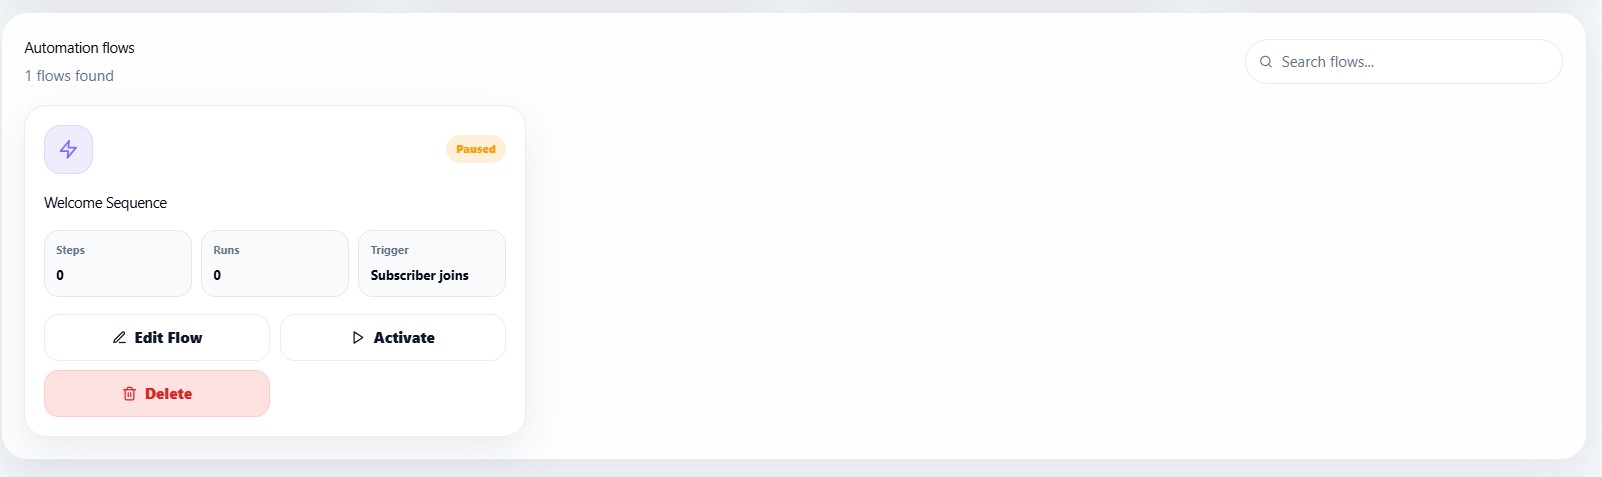
Search automation flows
Users can search flows by:
- Automation name
- Status
- Trigger type
The list updates automatically based on the search keyword.
Automation flow cards
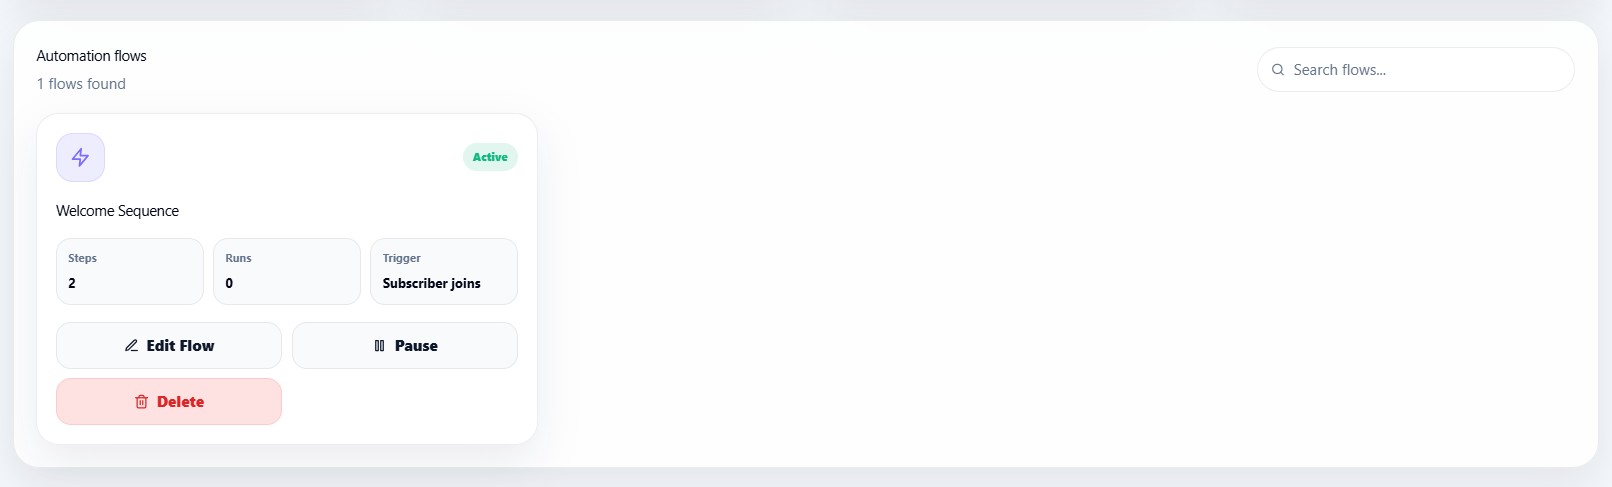
Each automation card displays:
- Flow name
- Status
- Number of steps
- Number of runs
- Trigger type
- Edit Flow button
- Pause or Activate button
- Delete button
Automation statuses
| Status | Meaning |
|---|---|
| active | Automation is live and can run |
| paused | Automation exists but is not active |
Edit flow
Clicking Edit Flow opens the Automation Builder for that flow.
The builder is where users add:
- Email steps
- Delay steps
- Email subjects
- Email body content
- Timing rules
Activate or pause automation
Active Automation
Pause Automation
Users can activate or pause an automation from the flow card.
Important rule:
An automation must have at least one step before it can be activated.
If a user tries to activate an automation with no steps, the dashboard shows a warning.
Delete automation
Users can delete a flow permanently.
Before deleting, the dashboard asks for confirmation:
Delete this automation permanently?
This prevents accidental removal of automation flows.
Empty state
If no automations exist, the dashboard shows:
No automations yet
Users are encouraged to create their first flow to start automating emails.
Loading state
When automation data is loading, the dashboard displays:
Loading automations...