Forms
CloudMySite Forms helps you create forms for your website so visitors can contact you, send messages, upload files, or submit other details.
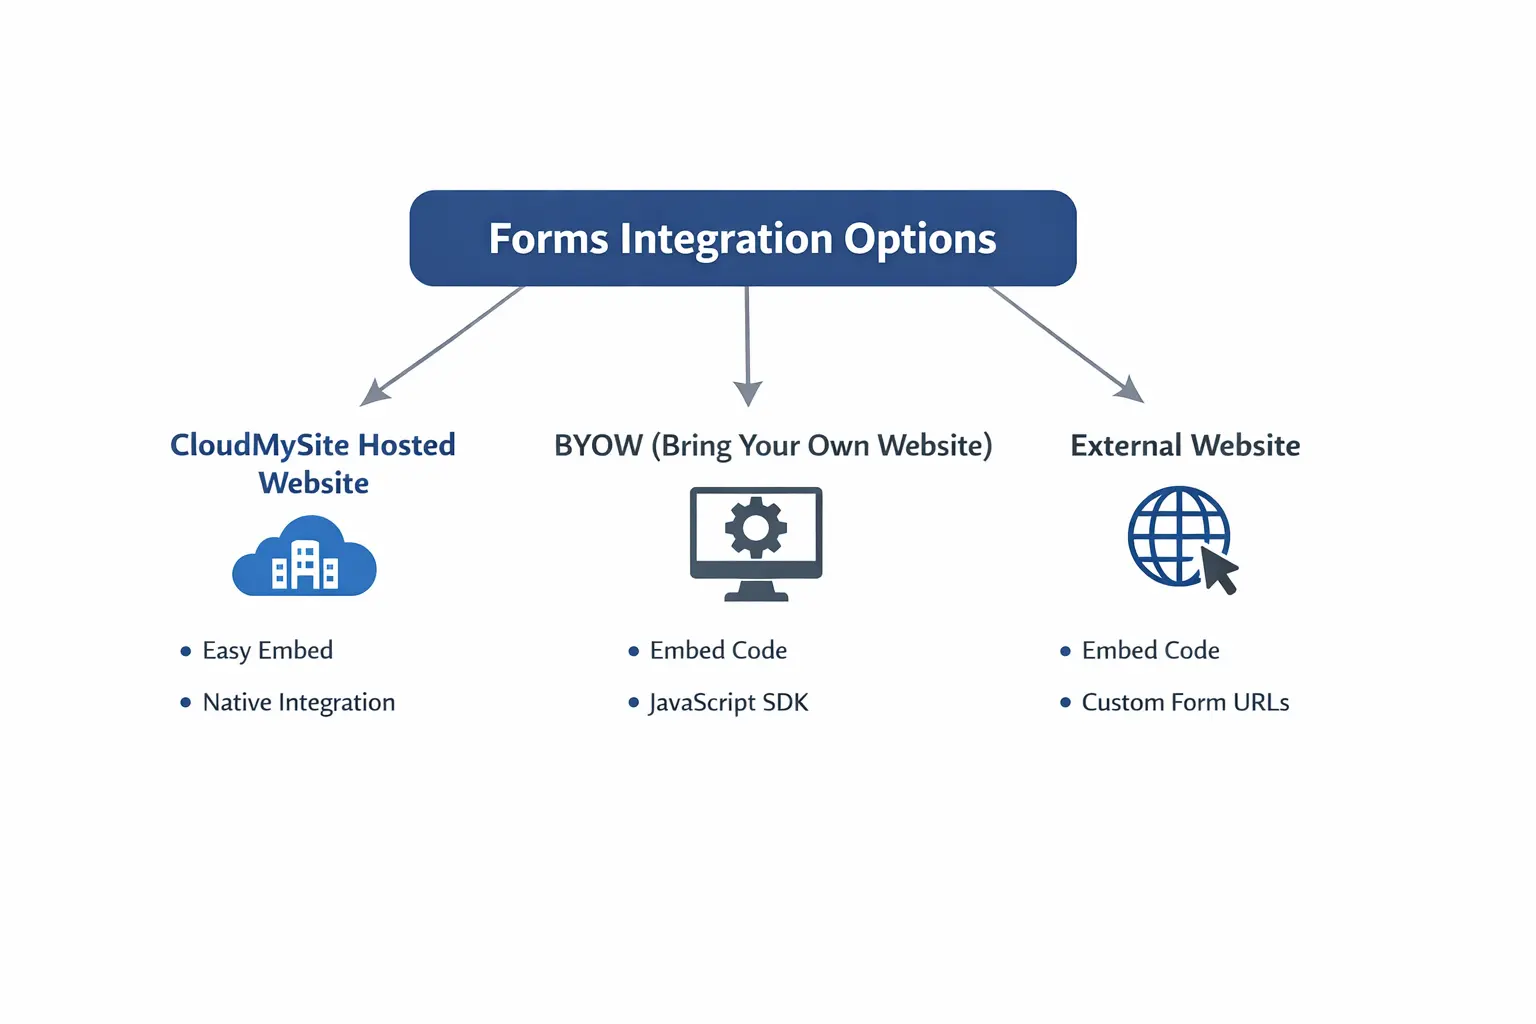
You can use Forms with:
- websites hosted with CloudMySite
- Bring Your Own Website (BYOW)
- other websites hosted anywhere else
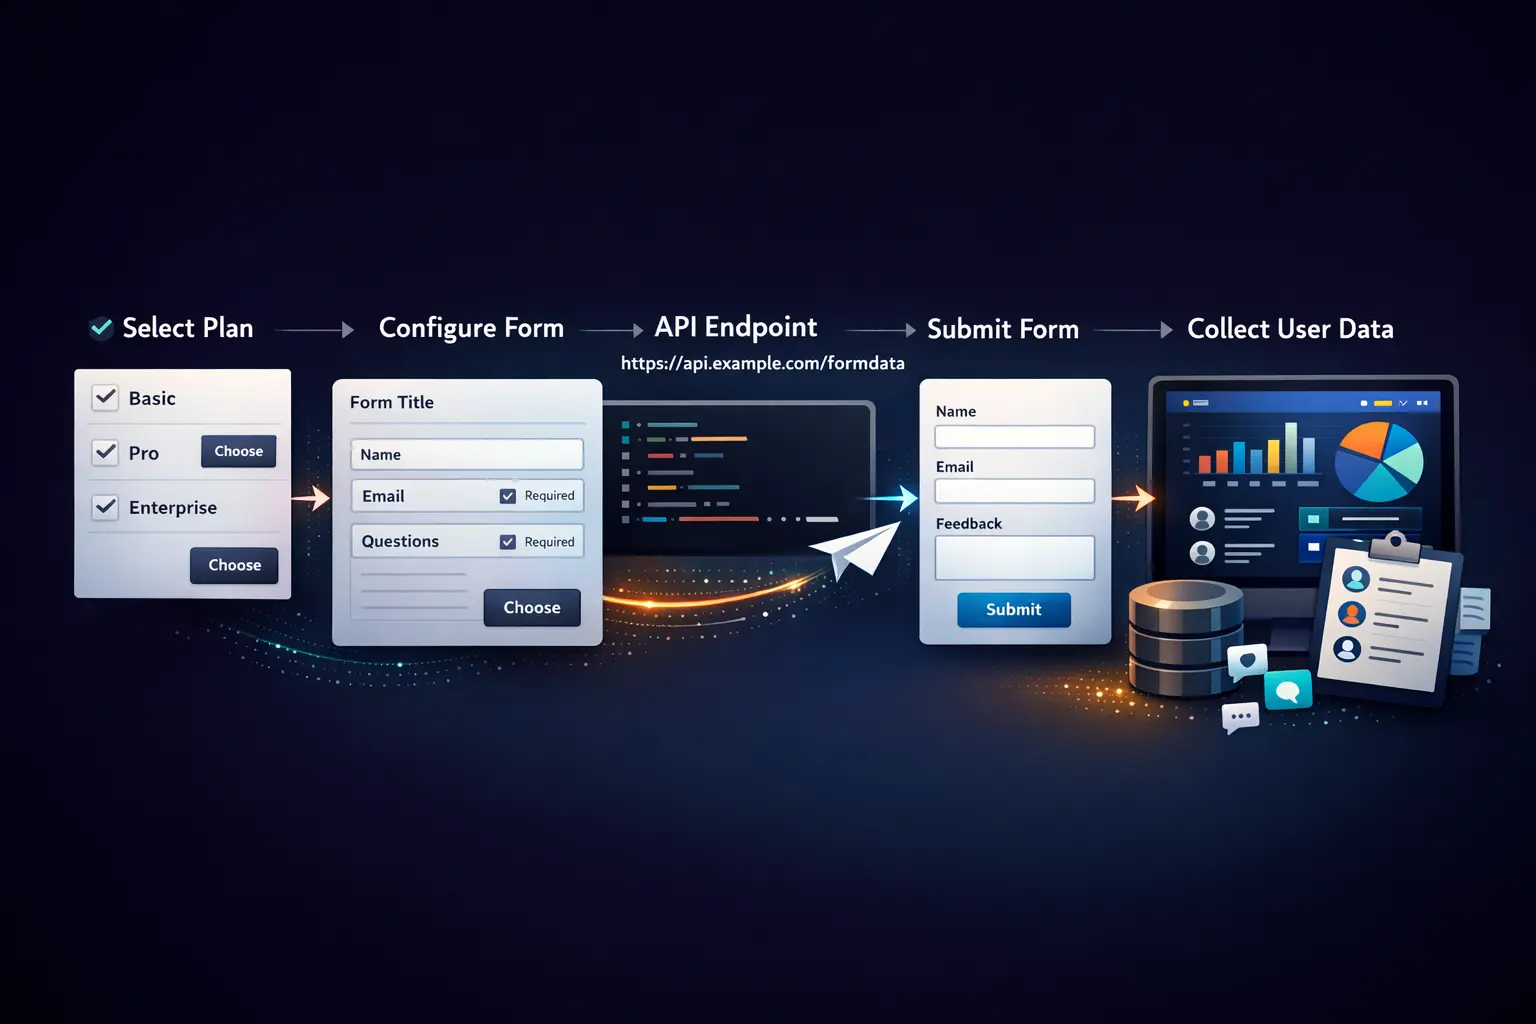
Forms is designed to be simple. You choose a plan, create a form, copy the form endpoint or code, add it to your website, and then manage submissions from your dashboard.
What You Can Do with Forms
With Forms, you can:
- create one or more forms under your plan
- send form responses to your email
- copy ready-to-use form code
- add forms to CloudMySite-hosted websites
- add forms to BYOW websites
- use forms on websites hosted elsewhere
- view form submissions in one place
- review basic form activity
- turn on spam protection
- connect submissions to Google Sheets
- set a redirect page after submission
- allow file uploads on supported plans
- upgrade or cancel your plan
How Forms Works
The normal flow is:
- Open your Form Plan.
- Create or configure your form.
- Enter a Form Name and Recipient Email.
- Save the form.
- Copy the generated Form Submission Endpoint or one of the code examples.
- Add the form to your website.
- Check your dashboard for new submissions.
- Update settings whenever needed.
Forms Flow
Form Plans
When you open the Forms area, you will see your available form plans.
From the plan area, you can:
- configure a new form
- manage an existing form
- upgrade your subscription
- cancel your subscription
If you do not have a form plan yet, you will see a message asking you to get started.
Create a Form
To create a form:
- Open Forms from your dashboard.
- Choose the plan you want to use.
- Click Configure Form.
- Enter a Form Name.
- Enter the Recipient Email where submissions should be sent.
- Click Configure.
After setup, CloudMySite creates a form endpoint for you.
This endpoint is the address your website uses to send form submissions.
Add the Form to Your Website
After the form is created, CloudMySite shows:
- the Form Submission Endpoint
- copy buttons
- ready-to-use code examples
You can add the form in different ways depending on where your website is hosted.
If your website is hosted with CloudMySite
You can open your website editor and place the form inside your page.
If you use Bring Your Own Website (BYOW)
You can copy the form endpoint and connect it in your own HTML or frontend application.
If your website is hosted somewhere else
You can still use CloudMySite Forms. Copy the code example and use the form endpoint in your website form.
Important Requirement
Every field in your form should have a name.
Examples:
nameemailmessage
If a field does not have a name, its value may not be captured in the submission.
Code and Integration Options
The Forms dashboard can show examples for:
- basic HTML form
- Fetch example
- AJAX example
- React example
- CURL example
- file upload example
- Turnstile example
- Google Sheets setup
- HTML with Honeypot
This helps you use the same form service across different websites and tools.
Dashboard Tabs
Once your form is created, you can manage it from the dashboard.
The dashboard includes these sections:
- Overview
- Code
- Submissions
- Settings
Overview
The Overview section helps you quickly understand form activity.
It can show items such as:
- request counts for the last 7 days
- request counts for the last 30 days
- basic submission activity
- request location view
This section is useful when you want a quick summary of recent form usage.
Code
The Code section shows:
- your form submission endpoint
- code examples you can copy
- integration options for different website types
This is the section you use when adding the form to your website or app.
Submissions
The Submissions section shows the responses sent through your form.
Here you can:
- view submitted entries
- open a submission to see its details
- review visitor information that was submitted
- track recent form activity
If there are no submissions yet, the dashboard will show that no submissions have been received.
Settings
The Settings section is where you control how your form works.
Depending on your plan, settings may include:
- form name
- recipient email
- redirect URL
- email template
- custom email template
- AI-generated email template
- spam protection
- file upload
- Google Sheets integration
- domain settings
- captcha settings
Spam Protection
Forms includes options to help reduce unwanted submissions.
Honeypot
Honeypot is a simple spam protection method that uses a hidden field to help block bots.
You can turn it on or off in form settings.
Turnstile and other captcha options
Forms also supports captcha-related protection settings.
You may see options such as:
- Turnstile
- reCAPTCHA
- hCaptcha
- custom captcha setup
If Turnstile is enabled, you may need to enter a valid domain in settings.
Redirect After Submission
You can set a Redirect URL so visitors are sent to another page after they submit the form.
Common examples include:
- thank you page
- confirmation page
- success page on your website
Email Notifications
Forms can send submission details to your chosen email address.
You can update the recipient email in settings at any time.
You may also have different email template options, such as:
- default CloudMySite email template
- custom HTML template
- AI-generated template on supported plans
File Uploads
Some plans support file uploads.
This is useful for forms such as:
- job application forms
- document upload forms
- support forms with attachments
If file upload is not included in your plan, the dashboard may ask you to upgrade.
Google Sheets Integration
On supported plans, you can send form submissions to Google Sheets.
This is helpful when you want to:
- keep records in a spreadsheet
- share submission data with your team
- organize responses outside email
To use Google Sheets, you will need to add the correct Google Apps Script Web App URL in form settings.
Multiple Forms
If your plan allows more than one form, you may see a list of forms inside the dashboard.
From there, you can choose which form to open and manage.
If your plan limit has been reached, CloudMySite may ask you to upgrade before creating another form.
Upgrade Your Plan
If you need more features or more forms, you can upgrade your subscription.
You may want to upgrade if you need:
- more forms
- Google Sheets integration
- file uploads
- advanced email template options
- additional form features
Cancel Your Plan
You can also request cancellation from the Forms area.
During cancellation, you may be asked for:
- cancellation reason
- optional comments
After you submit the request, support may review it and provide a support case ID.
Best Use Cases
Forms can be used for many website needs, including:
- contact forms
- quote request forms
- support forms
- lead capture forms
- inquiry forms
- job application forms
- feedback forms
Getting Started
If you are new to Forms, start here:
- Buy or activate a Form plan.
- Open Forms in your dashboard.
- Choose your plan.
- Create your first form.
- Copy the endpoint or code example.
- Add it to your website.
- Test the form yourself.
- Review submissions in the dashboard.
Next Steps
Use the pages in this Forms section to learn more about:
- getting started
- choosing and managing plans
- creating a form
- adding a form to your website
- viewing submissions
- changing settings
- turning on spam protection
- connecting Google Sheets
- upgrading or cancelling your plan