Bring Your Own Website – Step by Step Guide
This guide will walk you through the complete process of uploading and publishing your own website on CloudMySite.
You can host your HTML, CSS, static templates, PHP static exports, or Node.js static builds without any server setup.
Step 1: Visit CloudMySite
Start by opening the official website:
This is where you’ll access all products and hosting features.
Step 2: Open “Bring Your Own Website”
From the top header menu:
- Click on Products
- Select Bring Your Own Website
This option is designed for users who already have a website and want to publish it quickly.
Step 3: Click “Upload Your Website”
Scroll down the page and click on the Upload Your Website button.
- You’ll be redirected to the Create Account / Login page
- Create a new account or log in if you already have one
- After login, you’ll land on the CloudMySite Dashboard
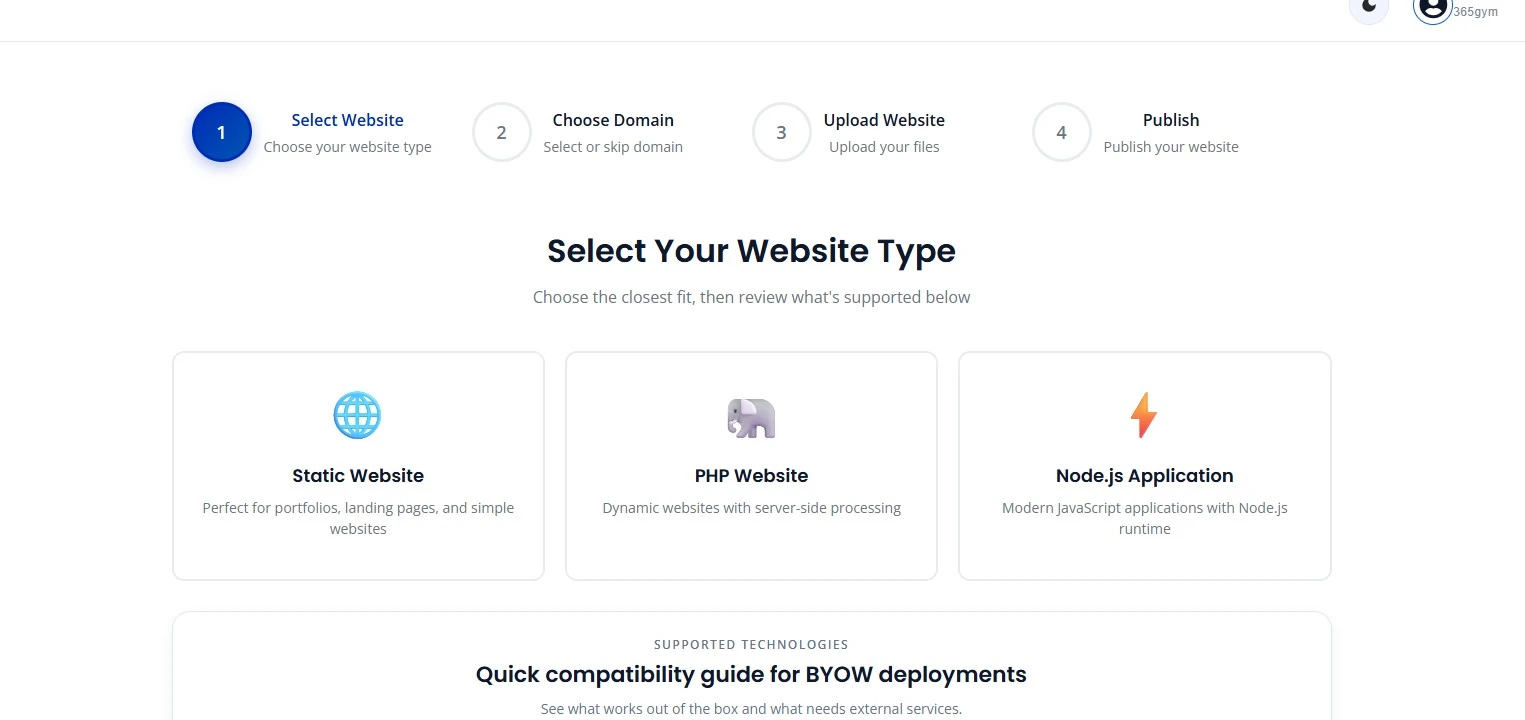
Step 4: Choose Website Type
Inside the dashboard, select the type of website you want to upload:
- Static Website (HTML, CSS, JavaScript)
- PHP Website (static/exported version)
- Node.js Application (static build only)
For simple websites, landing pages, and business sites, choose Static Website.
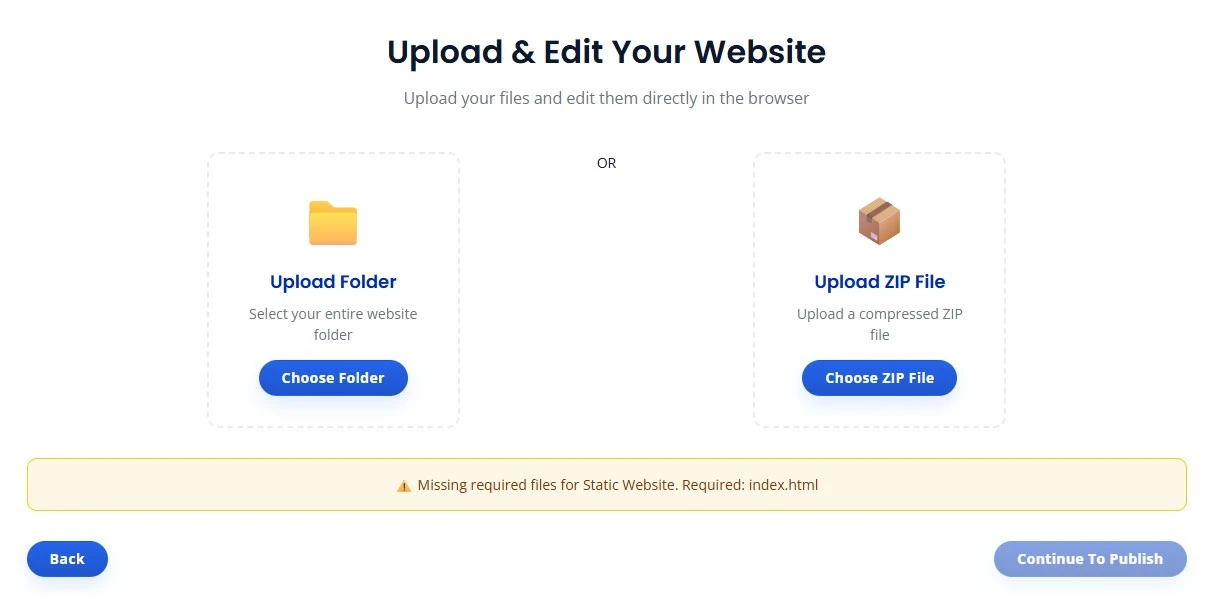
Step 5: Upload Your Website Files
You can upload your website in two ways:
- Upload a ZIP file
- Upload files folder-wise
Supported files include:
- HTML
- CSS
- JavaScript
- Images
- Assets
ZIP upload is recommended for faster deployment.
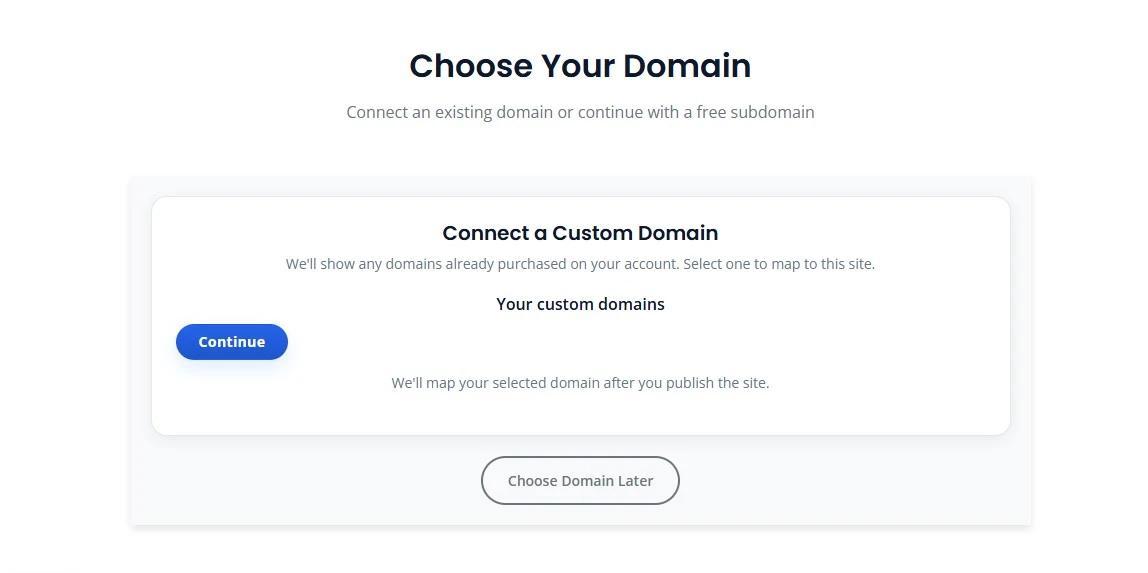
Step 6: Choose Domain (Optional)
Next, choose how you want to publish your website:
- Use your existing domain
- Use a CloudMySite subdomain
- Skip for now and connect domain later
You can always add or change your domain after deployment.
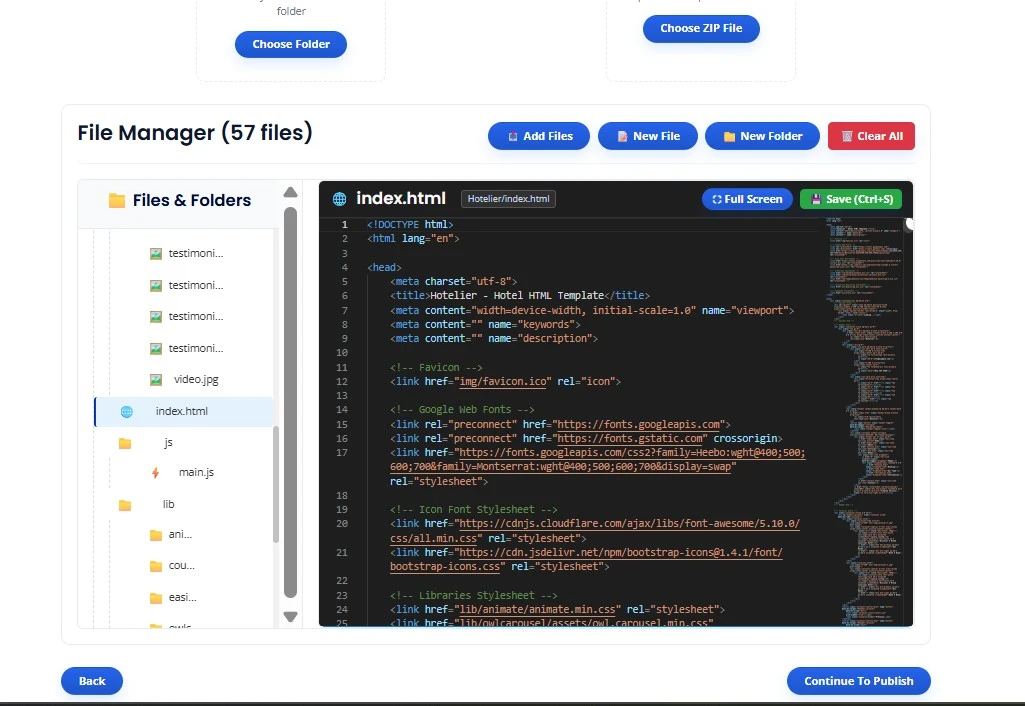
Step 7: Manage Your Website Files
After uploading:
- View all folders and files
- Edit pages if required
- Replace images or assets
- Update content easily
You stay in full control of your website files.
Step 8: Continuous Publishing
CloudMySite supports continuous publishing, which means:
- Upload updated files anytime
- Changes go live instantly
- No downtime
- No redeployment complexity
Just upload → save → publish.
Step 9: Publish Your Website Live
Finally:
- Select your domain or subdomain
- Click Publish
- Your website goes live instantly 🎉
Your site is now:
- Secure with HTTPS
- Fast worldwide
- Fully managed by CloudMySite
What CloudMySite Handles for You
- Hosting infrastructure
- SSL & HTTPS
- Performance optimization
- Security & uptime
- Server maintenance
You only focus on your website content.
Get Started Today
Bring your existing website and publish it in minutes — no servers, no stress, no complexity.
If you need help, our support team is always ready to assist.